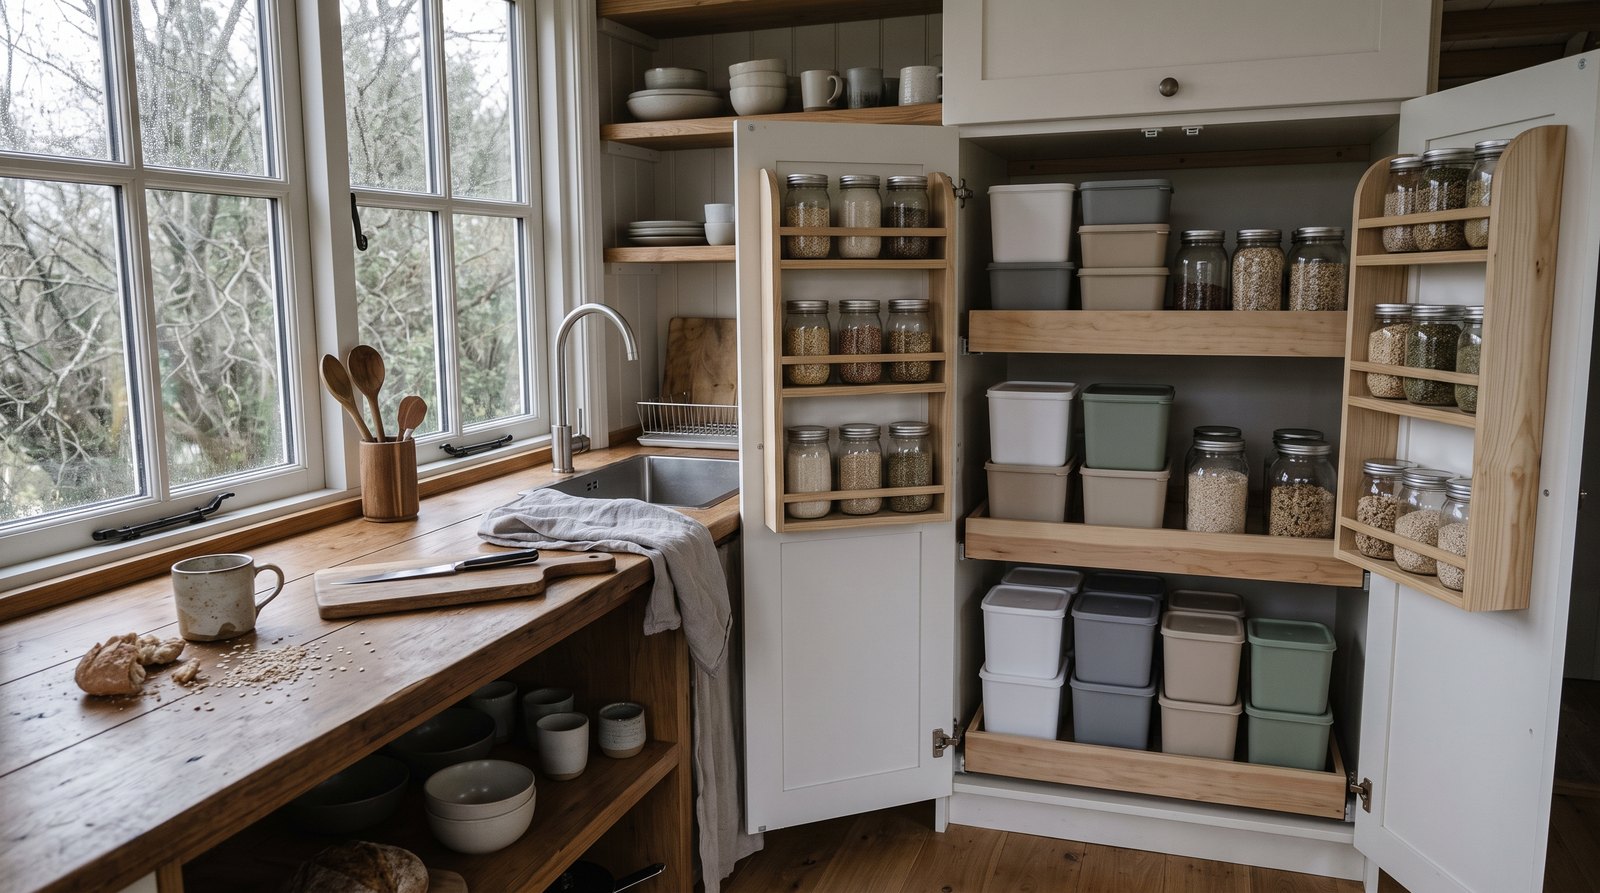
Tiny house pantry storage works best when shallow adjustable shelves handle everyday food, pull-outs make deep spaces reachable, and drawers contain small or heavy items. In a home on wheels, every shelf also needs a lip or latch. The right mix depends on cabinet depth, travel frequency, mobility, humidity, and budget.
Table of Contents
Plan the pantry around what you actually store
Start with groceries, not cabinet catalogs. Measure the tallest bottles, widest appliances, heaviest cans, and the amount of food you normally keep between shopping trips. A tiny pantry succeeds when each shelf has a specific job and frequently used items stay visible, reachable, and easy to return after cooking.
Make a quick inventory before drawing the cabinet. Group items into daily staples, baking supplies, canned goods, snacks, bulk dry goods, and occasional appliances. Record the height of the tallest item in each group, then add about an inch of clearance. This prevents the familiar mistake of creating evenly spaced shelves that waste vertical room above short jars.
Depth matters as much as width. Shelves about 8 to 12 inches deep usually let you see one or two rows without losing food at the back. A deep 20 to 24 inch base cabinet is better with a full-extension tray or drawer. If you must use a deep fixed shelf, add a removable bin that can be lifted out as one unit.
Keep everyday food between roughly knee and shoulder height. Reserve the lowest level for heavy cans, water, or small appliances, and place light backup supplies higher. This simple arrangement reduces bending, limits the damage from falling items, and makes the pantry easier to use for children or anyone with limited reach.
Quick answer by situation
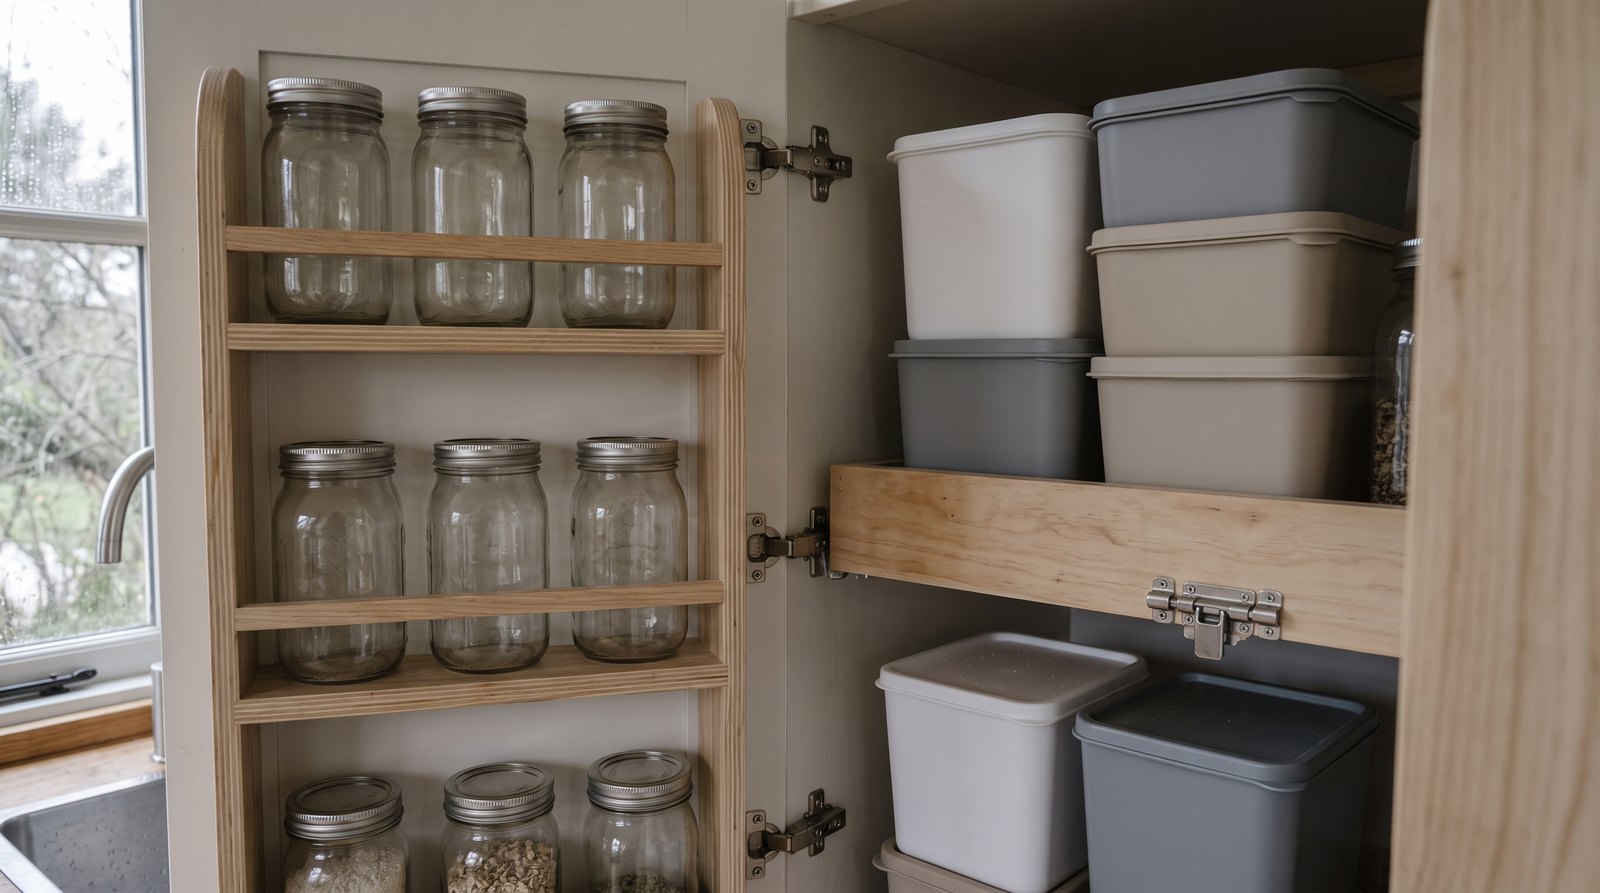
The best pantry type changes with the available space and how the house moves. Adjustable shelves are the flexible default, while pull-outs solve deep cabinets and drawers organize small items. Under-stair storage is useful when carefully divided. A mobile tiny house needs stronger attachment, lower weight, positive latches, and shelf restraints.
- Shallow wall cabinet: Choose adjustable shelves with 1 to 2 inch front lips.
- Deep base cabinet: Use full-extension trays or drawers so the back remains reachable.
- Narrow gap beside a refrigerator: Consider a slim pull-out only if its slides and frame are firmly anchored.
- Space under stairs: Combine a few pull-out boxes with open, ventilated shelves.
- Tiny house on wheels: Add positive travel latches, shelf lips, and a pre-trip unloading plan for fragile or unusually heavy goods.
- Limited mobility: Favor waist-height drawers with easy-grip pulls and full-extension slides.
- Low budget: Start with plywood shelves and removable bins, then add hardware after living in the space.
Shelves, pull-outs, or drawers?
Adjustable shelves offer the most storage for the least money and weight. Pull-out trays improve access in deep cabinets, while drawers control small packages and heavy goods. For most tiny homes, the practical answer is adjustable shelves above counter height and one or two full-extension trays or drawers below it.
Fixed shelves are simple and stiff, but they lock you into one arrangement. They make sense where the load and container height rarely change, such as a dedicated microwave shelf. Elsewhere, rows of shelf-pin holes or metal standards let you tune the spacing as your groceries and routines change.
Pull-out trays retain low sides, so bottles and jars are visible from above. They work well in a deep base cabinet, but the hardware needs enough clearance for doors and hinges. Select slides with a published load rating, then count the weight of the tray itself. A drawer full of canned goods becomes surprisingly heavy.
Drawers are best for packets, snacks, lids, towels, and other items that otherwise scatter. Taller drawers can hold food containers, but high sides hide contents unless you use dividers. Avoid making every pantry level a drawer. Slides, boxes, and clearances consume space and add more weight than a shelf.
A tall narrow pull-out can fit an awkward gap, but it puts the entire moving load on one frame and one set of slides. It must remain square, resist racking, and have a positive latch in a THOW. A five-inch commercial pull-out currently sells for more than $200 at major retailers, so it is rarely the budget choice.
Use tall and under-stair spaces without creating a trap
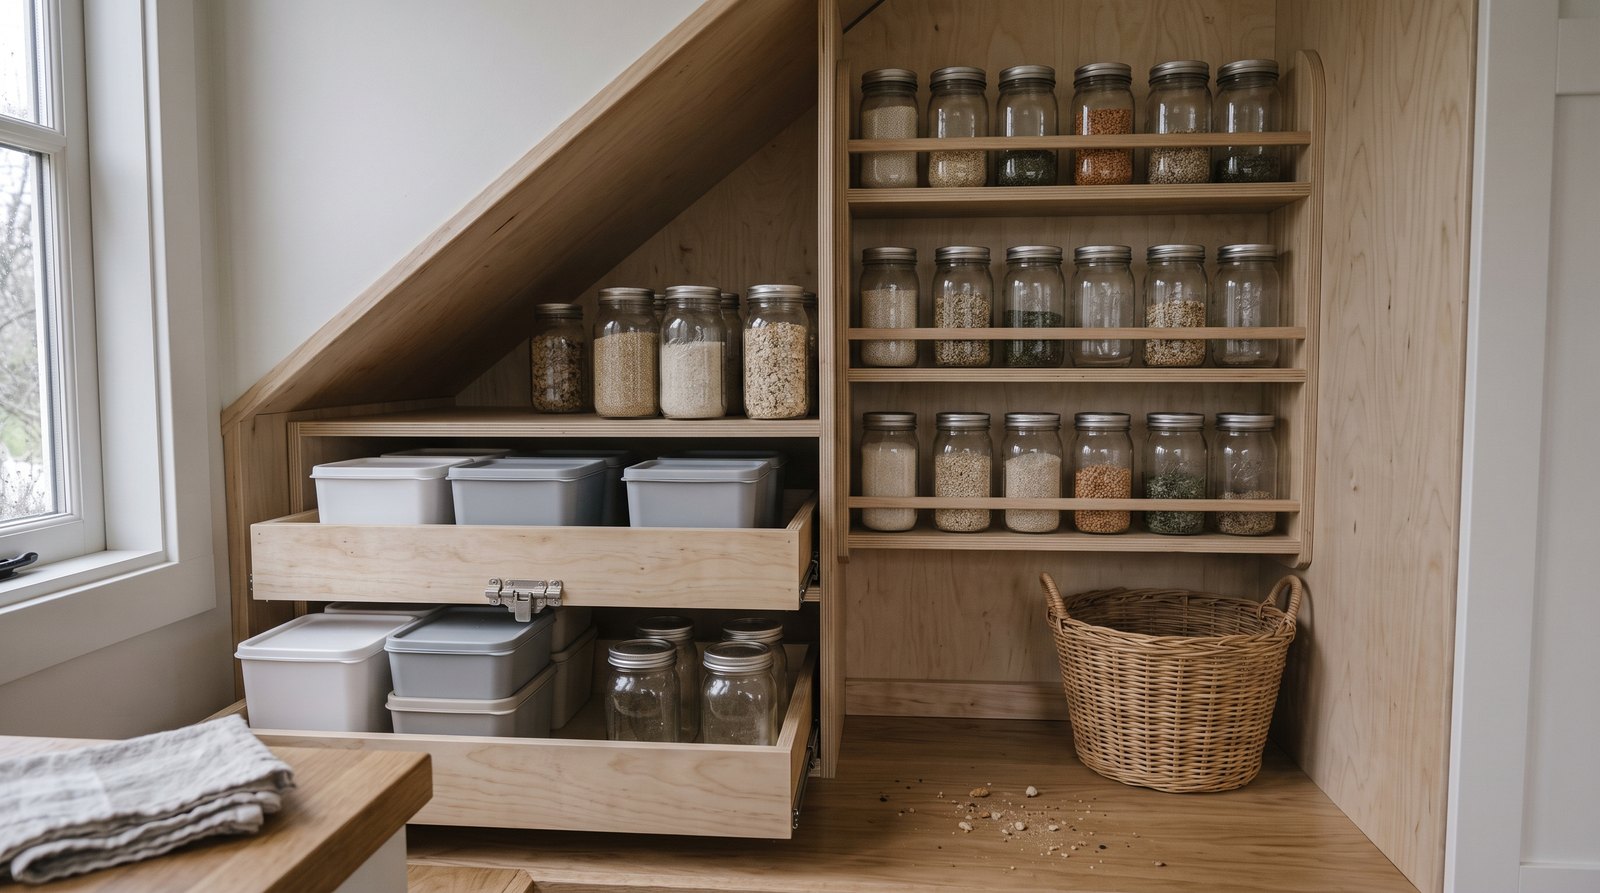
Tall cabinets and stair cavities can add substantial storage, but only when their deepest corners remain reachable and dry. Divide the volume into smaller zones instead of building one dark cave. Keep plumbing access, electrical equipment, ventilation paths, and structural connections clear, and make removable panels obvious before filling the space.
Under stairs, shallow side-access drawers usually work better than a door opening into the deepest end. Use the triangular upper area for light backup goods, baskets, or paper products. Keep food away from an uninsulated exterior wall where condensation develops, and do not block the return-air path for a heater or mini-split system.
A floor-to-ceiling cabinet should be attached through solid cabinet backs, cleats, or blocking, not just thin wall paneling. Tall narrow furniture can tip even in a stationary house. In a moving tiny house, road vibration and cornering add repeated loads, so connect the cabinet to framing and follow the fastener, wall, and cabinet manufacturers’ instructions.
Leave access to water shutoffs, electrical junctions, trailer fasteners, and inspection points. A removable shelf or drawer is much easier to live with than dismantling finished cabinetry after a leak. If an under-stair bay contains plumbing, use a water-resistant tray at the bottom and check it during routine cleaning.
Secure pantry storage in a tiny house on wheels
A THOW pantry needs secure cabinet attachment, positive door and drawer latches, raised shelf edges, and sensible weight placement. Soft-close hardware is not a travel lock. Put dense goods low and near the trailer’s designed load area, remove fragile items before towing, and verify total and axle weights after loading.
For doors, use a latch that cannot release from vibration or a hard bump. Magnetic catches alone may be fine for a stationary cabinet, but they are not dependable travel restraints. Drawers also need a positive catch even when fitted with self-closing or soft-close slides. Test each closure by pulling firmly before departure.
Add a wood rail, elastic restraint, or fitted bin at the front of open shelves. A 1 to 2 inch lip is useful for short jars, but taller or top-heavy containers may need a deeper restraint. Pack glass separately for travel. Emptying a few vulnerable shelves takes less time than cleaning broken glass and food from a finished interior.
Do not treat pantry capacity as permission to overload the trailer. Dense foods and appliances should be distributed with the tiny house builder’s loading plan in mind. Weigh the completed, normally loaded home at a certified scale and compare the result with the trailer, tire, axle, and tow-vehicle ratings. For broader planning, see our tiny house moving cost guide.
Control moisture, food safety, and pests
A pantry should stay cool, dry, clean, and separated from plumbing leaks, cooking heat, and condensation-prone surfaces. Ventilate closed cavities, monitor humidity, and rotate food so older packages are used first. Airtight containers help with pests and spills, but they do not make refrigerated food safe at room temperature.
The USDA shelf-stable food guidance recommends storing canned and other shelf-stable foods in a cool, dry place, not above a stove, under a sink, or in a damp area. Follow every package’s storage directions, especially labels that say to refrigerate before or after opening.
Humidity deserves attention in a small home because cooking and showering can change indoor conditions quickly. The EPA recommends 30 to 50 percent indoor relative humidity. A basic digital hygrometer makes trends visible. Fix leaks promptly, use exhaust ventilation, and leave an air gap where a cabinet sits against a cold exterior wall.
Use smooth, washable shelf surfaces and seal raw plywood edges. Vacuum crumbs from drawer slides and corners, then wipe with the cleaner recommended for the finish. Store grains and pet food in tight containers, inspect incoming packages, and avoid keeping cardboard shipping boxes in the pantry. They occupy space and can shelter insects.
Check canned goods for rust, leaks, swelling, or deep dents, and discard questionable items according to food-safety guidance. Date decanted dry goods so the container does not erase the original use-by information. Keep cleaning chemicals in a separate, labeled location, never in a food container or immediately beside pantry staples.
What tiny house pantry storage costs in 2026
A simple DIY pantry can cost about $75 to $250 for plywood, finish, shelf pins, cleats, and basic latches. Adding two quality pull-outs often brings the project to $200 to $600. A custom tall cabinet may reach $800 to $2,500 or more, depending on materials, hardware, labor, and site conditions.
Current retail examples show why hardware changes the total. Basic shelf pins can cost only a few dollars per pack. Common full-extension soft-close slide pairs are roughly $20 to $40, while manufactured pull-out cabinet organizers range from about $33 for a simple drawer to several hundred dollars for tall or specialty units. Prices vary by size and market.
For a realistic budget, separate the project into cabinet material, finish, slides, latches, pulls, dividers, fasteners, and labor. Include blocking or wall repair if the cabinet lacks a solid attachment point. A carpenter or cabinet installer may also need extra time in a finished tiny house because floors and walls are rarely perfectly square.
Spend first on safe attachment, reliable slides, and positive travel latches. Decorative fronts and elaborate dividers are easier to add later. If the budget is tight, install adjustable shelves and sturdy bins, then live with the arrangement for a month. Your daily routine will show exactly where one pull-out or drawer is worth its cost.
Installation and maintenance checklist
Measure the cabinet opening at several points, verify door and hinge clearances, locate framing or blocking, and check for hidden wiring or plumbing before drilling. Build square, follow each hardware maker’s instructions, and test the loaded system. In a THOW, inspect fasteners and latches before the first trip and periodically afterward.
- Measure twice: Record the narrowest width, shallowest depth, and any hinge intrusion.
- Plan the load: Use the slide manufacturer’s rating, including the drawer or tray weight.
- Anchor correctly: Fasten cabinet bodies and cleats into framing or installed blocking.
- Protect food: Seal wood, allow airflow, and keep the pantry away from leaks and excess heat.
- Prepare for travel: Fit positive latches and restrain containers on every open shelf.
- Maintain access: Preserve clear routes to shutoffs, junction boxes, and service panels.
- Recheck: Tighten loose screws, clean slide tracks, and watch for condensation or pest signs.
When you evaluate the rest of the interior, remember that storage weight is only one part of long-term durability. Materials, moisture control, towing loads, and routine inspection all work together. Our guide to how long tiny houses last explains the larger maintenance picture, while the tiny house versus RV comparison covers travel and full-time living tradeoffs.
Frequently asked questions
Most pantry questions come down to depth, accessibility, safe food storage, and travel security. The answers below cover the practical choices that cause the most trouble in small homes. Always follow product instructions, trailer ratings, and any applicable building, fire, or campground requirements for your particular tiny house and location.
How deep should tiny house pantry shelves be?
For everyday food, shelves about 8 to 12 inches deep usually keep items visible and reachable. Deeper shelves can work for appliances or large bins, but use a pull-out tray or removable container so food does not disappear behind the front row. Measure your actual groceries before choosing a final depth.
Are pull-out pantry shelves worth the cost?
Pull-outs are worth paying for in a deep lower cabinet or when bending and reaching are difficult. They add hardware, weight, and installation complexity, so they are less useful in a shallow cabinet. Put them where access improves most, then use lighter, cheaper adjustable shelves in the remaining pantry space.
How do you keep pantry items secure while towing?
Use positive cabinet and drawer latches, shelf lips or fitted bins, and low placement for dense goods. Remove glass and unusually heavy items before travel when practical. Soft-close slides and magnetic catches are not travel locks. Check closures before departure and inspect the cabinet attachment and hardware after each early trip.
Can food be stored in an under-stair pantry?
Yes, if the area stays cool, dry, clean, ventilated, and free of chemicals or pest activity. Do not block plumbing, electrical, HVAC, or structural access. Keep food away from leaks and condensation-prone exterior surfaces, follow package directions, and use removable shelves or drawers where future service access may be needed.
What is the cheapest way to build a tiny house pantry?
The lowest-cost practical approach is a secured plywood cabinet with adjustable shelves, simple front lips, basic positive latches, and a few washable bins. Start with the minimum hardware and add a pull-out only after daily use proves it necessary. Safe wall attachment and sealed, cleanable surfaces should never be budget shortcuts.