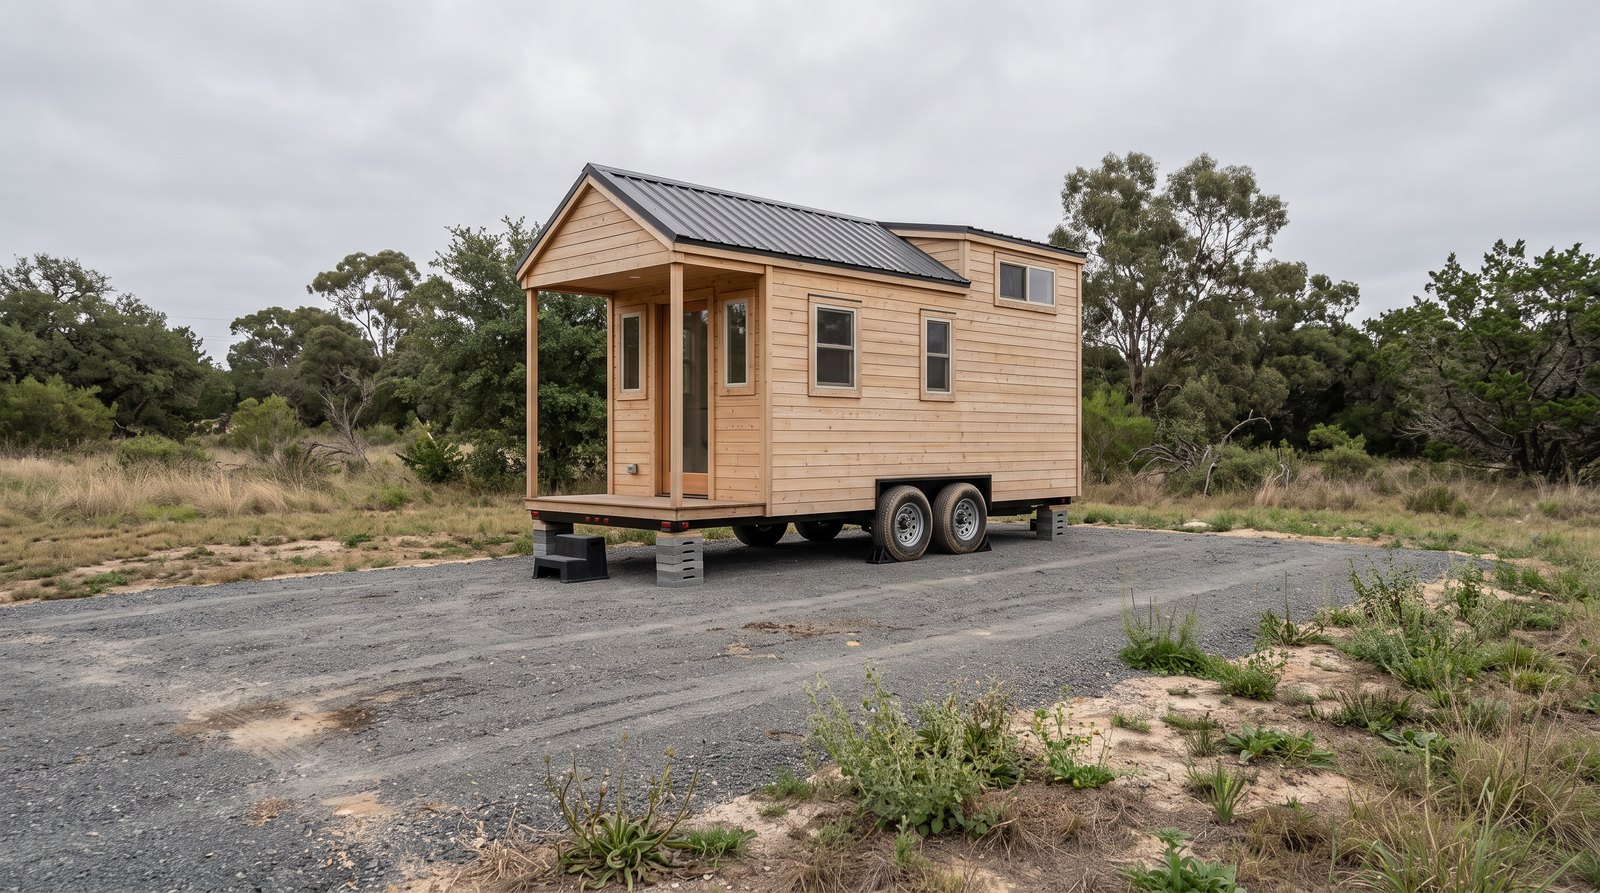
Tiny house leveling and stabilization should happen in three stages: build or choose a firm, drained parking surface, level the wheels and tongue, then lower correctly rated stabilizers until they are snug. Chock the wheels before unhitching, keep tires carrying their intended load, and never use stabilizer jacks to lift unless their manufacturer specifically permits it.
Table of Contents
Quick answer by situation
The right setup depends on how long the house will stay, what the surface is made of, and how much correction the site needs. Portable blocks may be enough for a weekend. A full-time placement usually needs a compacted pad, larger footings, a planned drainage route, and scheduled inspections.
- Occasional overnight stop: Use a visibly firm, nearly level site, chock both sides of the wheels, level with rated wheel blocks, adjust the tongue jack, and snug the stabilizers.
- Seasonal parking: Add wide jack pads, check drainage after rain, and recheck level after the first week and after major weather changes.
- Full-time location: Invest in a compacted aggregate or engineered pad, control runoff, use the trailer maker’s approved support points, and keep an inspection log.
- Soft soil or visible sinking: Stop adding jack pressure. Rehitch if necessary, move the house, and rebuild the bearing surface before continuing.
- Steep or windy site: Treat it as a site-design problem. Blocks and stabilizers cannot make a poor location safe. Ask the builder or a local engineer for a support and anchoring plan.
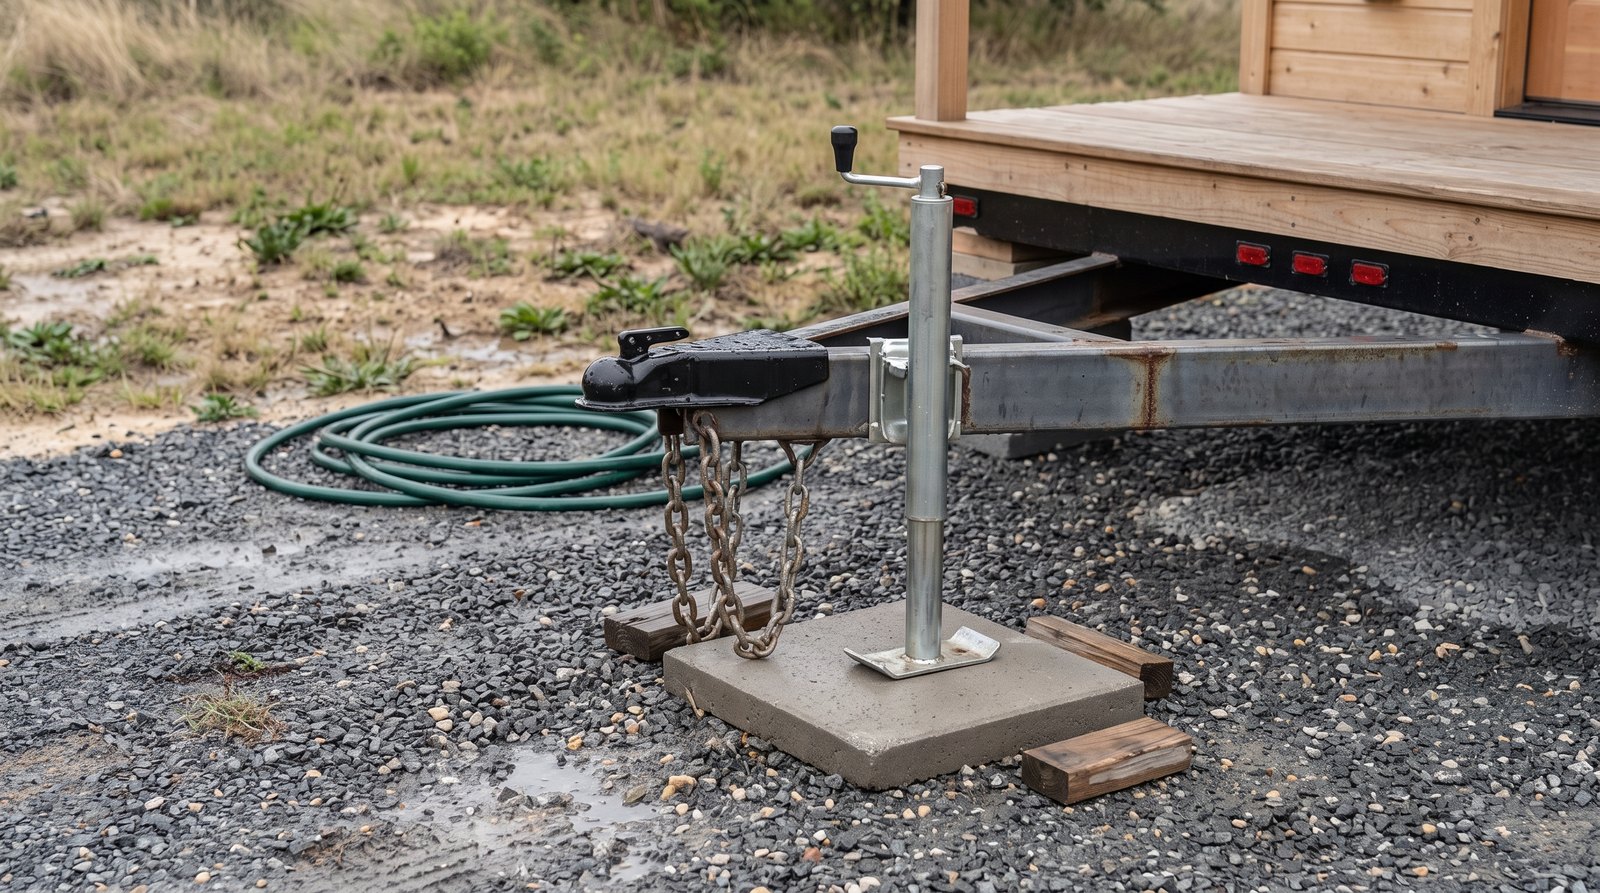
Start with a firm, drained parking pad
A parking pad should spread wheel and jack loads without rutting while moving water away from the trailer. Compacted angular aggregate generally performs better than loose rounded gravel because it locks together. The final surface can have slight drainage fall, but the wheel paths and support points must let you bring the house level safely.
Strip away sod, roots, topsoil, and other organic material from the load area. Those materials hold moisture and decompose, which encourages settlement. On weak or wet soil, a geotextile separator and a properly designed aggregate section can reduce mixing between the stone and subgrade. Pad depth is site-specific, so soil, frost, drainage, and house weight all matter.
Direct roof runoff away with gutters and downspouts. Do not let a hose, condensate drain, or downspout discharge beside a wheel, tongue jack, or cribbing stack. Watch the pad during a hard rain. Standing water, pumping fines, spreading gravel, or a new rut means the support system needs correction, not a tighter stabilizer.
Level side to side at the wheels
Correct side-to-side tilt by raising the low-side wheels with rated leveling blocks or a rated ramp system. The tires and axles should continue carrying the house as designed. Do not try to pull one corner up with a stabilizer, and do not stack random masonry, loose boards, or smooth materials that can split or slide.
Before moving onto blocks, inspect the route and make sure every tire will remain fully supported. Tandem axles normally need support under both tires on the low side unless the product and trailer maker approve another method. Keep the tread centered on the block. A tire hanging over an edge can damage its sidewall and concentrate load on the block.
Use a long carpenter’s level on a reliable floor reference, or use a calibrated digital level. Raise the low side in small increments, stop, and check again. Once level, place substantial wheel chocks tightly against the tires in both directions. Chocks work best on a firm surface and must be large enough for the tire. If a chock can sink, roll, or skate on the surface, change the surface or equipment.
If you recently moved the house, inspect the running gear before treating it as stationary. Moving costs and setup risks vary sharply with route and size, as explained in our 2026 tiny house moving cost guide.
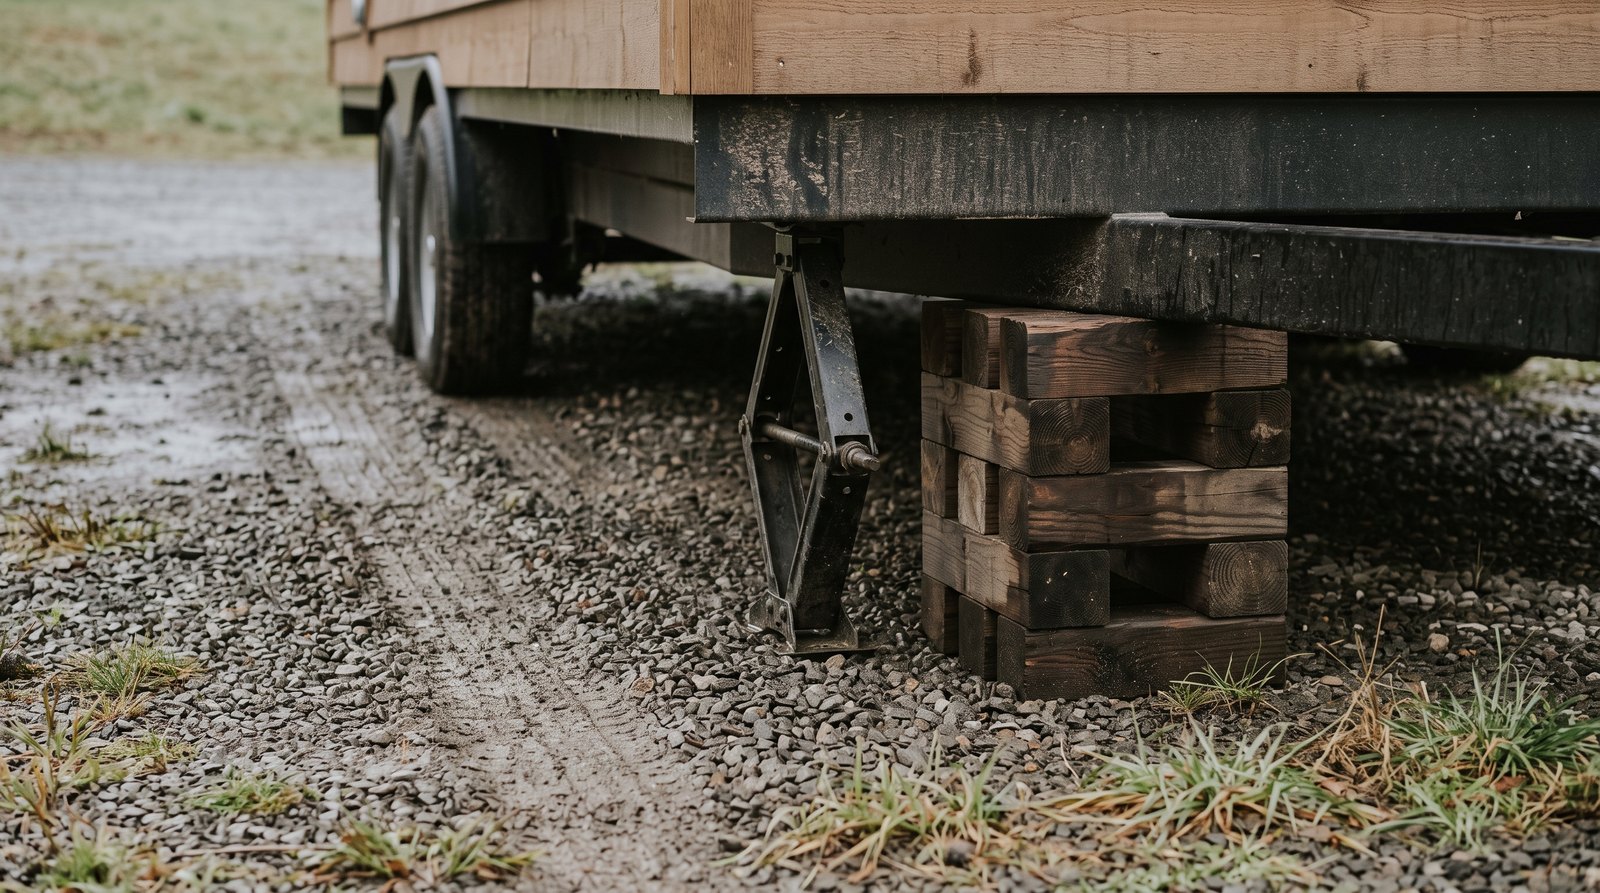
Level front to back with the tongue jack
After the wheels are chocked and the house is secure side to side, use the tongue jack to set the front-to-back level. Put its foot on a flat, solid pad, keep the jack vertical, and stay within its rated travel and capacity. Never place hands or feet beneath a loaded jack or unsupported tongue.
The tongue jack carries a meaningful share of the parked load, so do not size it from a guess or from total trailer weight alone. Check the original jack specification, the builder’s documentation, and the actual tongue load. If records are missing, a trailer shop can inspect the assembly and help obtain a reliable weight measurement.
Do not confuse a tongue jack with every other jack on the trailer. Product instructions differ. Even Lippert’s manual tongue jack support page warns that its referenced jacks are intended to stabilize, not level, the unit. The label and manual for your exact equipment control.
Stabilize the frame without trying to lift it
Stabilizers remove bounce and rocking after the tiny house is level. Lower them onto firm pads at frame locations approved by the trailer manufacturer, then apply only enough pressure to remove play. Unless the exact system is designed and rated for lifting, the wheels and tongue jack should remain the primary load path.
Many scissor-style units look like vehicle jacks but are not substitutes for lifting jacks. Current manufacturer instructions commonly warn against lifting tires off the ground, changing tires with stabilizers, exceeding capacity, or forcing trailer corners upward. Excess pressure can rack the frame, bind doors and windows, crack finishes, or damage plumbing and cabinets.
Bring each stabilizer down gradually and alternate between locations so you do not twist the structure. Stop when the foot is seated and movement is controlled. More torque is not automatically safer. Never use an impact wrench unless the equipment manual explicitly allows it, and never crawl under a trailer supported only by jacks or loose blocking.
Choose blocks, pads, jacks, and cribbing by load
Every support component needs a visible rating or a defensible engineered capacity greater than the load it will carry. That includes wheel levelers, tongue jacks, stabilizers, foot pads, and any purpose-built cribbing. The weakest item controls the system, and a high total rating does not excuse a poor contact point.
Start with the house’s certified scale weights if available. Separate axle weight from tongue load, and account for water, batteries, propane, furniture, and personal belongings. Compare those numbers with each product’s manual and the way the load is divided. A four-pack rating may describe the entire set, while another product may list capacity per jack.
Use broad, flat pads beneath jacks on gravel, asphalt, or soil. A small metal foot can punch into hot asphalt or wet ground. Keep plastic blocks within their temperature, height, and stacking limits. Replace cracked, bowed, UV-damaged, or oil-softened pieces. Never mix systems unless their shapes lock together safely.
Cribbing deserves extra caution. Use sound, straight, defect-free timbers of a known species and size, laid in stable interlocking tiers on a firm base. Keep the stack low, centered, and vertical. Concrete masonry units, landscape pavers, firewood, and scrap lumber can fail suddenly because they are not designed for concentrated support loads. Permanent or occupied cribbing should be designed or approved by a qualified professional.
Plan for settlement, frost, wind, and long stays
A setup that feels solid today can change as rain softens soil, heat affects asphalt, frost moves the subgrade, or repeated use shifts the load. Recheck level and every contact point after initial occupancy, after major storms or freeze-thaw cycles, and whenever doors bind, floors feel different, or utility lines become tight.
Stabilizers are not wind anchors. In exposed locations, uplift and sliding can require engineered anchoring tied to suitable ground anchors or foundations. The right system depends on wind exposure, soil, frame design, local code, and whether the house is treated as an RV or a dwelling. Confirm requirements with the city or county and with the manufacturer.
Long-term moisture control also protects the structure. Keep weeds and soil away from the frame, maintain coatings, and inspect for rust where pads or hardware trap water. These details affect service life, along with the broader maintenance issues covered in our guide to how long tiny houses last.
What tiny house leveling costs in 2026
A portable leveling and chocking setup often costs about $80 to $300, depending on capacity and whether you buy blocks, curved levelers, rubber chocks, and jack pads separately. A permanent pad can cost far more because excavation, aggregate delivery, compaction, drainage, access, soil repair, and professional design are the expensive parts.
Current retailer listings show basic block sets around $40 to $80, combined leveler and chock kits around $75 to $140, and larger premium kits above $200. Treat those as shopping benchmarks, not a complete budget. Verify the rating and dimensions rather than choosing the cheapest kit that looks similar.
A safe setup sequence
The safest sequence keeps the tow vehicle connected until the wheels are level and securely chocked, then uses the tongue jack for front-to-back adjustment and stabilizers only for motion control. Read every product manual first, keep bystanders clear, and stop immediately if a block shifts, a pad sinks, or the frame makes unusual sounds.
- Inspect the site, drainage route, overhead clearance, and emergency exit path.
- Confirm that blocks, pads, chocks, and jacks are undamaged and properly rated.
- Position the house and level it side to side at the wheels.
- Chock the wheels firmly in both directions before unhitching.
- Place a solid pad beneath the tongue jack and adjust front to back.
- Lower stabilizers onto approved pads and frame points until snug.
- Check doors, windows, plumbing, electrical connections, stairs, and decks for strain.
- Reinspect after occupancy and after weather changes.
Common mistakes to avoid
The most serious mistakes come from treating stabilizers as lifting jacks, using unrated materials, or trying to correct a failing pad with more pressure. Other frequent problems include supporting only one tire on a tandem axle, leaving tires partly off blocks, placing jacks on loose gravel, and forgetting that utilities need movement allowance.
Do not place hollow concrete blocks on their sides or use stacked patio pavers as structural supports. Do not build a tall, narrow tower to save jack travel. Do not assume a level phone app proves the load is distributed correctly. Level describes orientation, while stability describes resistance to movement. You need both.
A porch, stair, skirting panel, or utility connection should not quietly become a support point as the trailer settles. Leave appropriate clearance and use flexible connections approved for the installation. If a door begins sticking, a window cracks, siding buckles, or a plumbing joint strains, reduce occupancy and have the setup inspected.
Frequently asked questions
These answers cover the practical questions owners ask most often, but equipment labels, manufacturer instructions, site conditions, and local rules always take priority. A tiny house is heavier and less forgiving than a small camping trailer, so stop and seek professional help whenever the ground, frame, or load path is uncertain.
Should tiny house tires stay on the ground?
Usually, yes. For a typical tiny house on wheels, the tires and axles remain part of the intended support system while wheel blocks correct side-to-side level. Do not lift tires clear with stabilizers. A different long-term support arrangement should come from the trailer manufacturer or an engineer who has reviewed the actual frame.
Can stabilizer jacks level a tiny house?
Most stabilizer jacks should only remove rocking after the house is level. They are not lifting jacks unless the exact product manual says otherwise. Use rated wheel blocks for side-to-side correction and the approved tongue jack for front-to-back adjustment. Excess stabilizer force can twist the frame and damage the house.
What should go under tiny house jacks?
Use a flat, rated jack pad or a professionally designed footing that spreads the load onto firm, compacted material. The pad must resist crushing, sliding, and sinking in wet soil or hot asphalt. Avoid loose boards, hollow blocks, landscape pavers, and any improvised stack whose capacity and stability are unknown.
How often should a parked tiny house be re-leveled?
Check a new setup after the first day, first week, and first major rain, then monthly until it proves stable. Recheck after freeze-thaw cycles, flooding, high winds, or unusual heat. Binding doors, sloping floors, sinking pads, stretched utility lines, or shifting skirting are reasons to inspect immediately rather than waiting.
Do I need professional help for a permanent setup?
Professional input is wise when the house will be occupied long term, the soil is soft or sloped, frost is significant, anchors are required, or frame support points are undocumented. A local contractor can build the pad, while the trailer manufacturer or engineer should approve structural supports. Confirm permits with the city or county.