A tiny house plumbing manifold is usually worth considering when you want individual fixture shutoffs, simple leak isolation, and fewer concealed fittings. A compact home-run layout works especially well when fixtures cluster near one service cabinet. The final design still depends on fixture demand, pipe listing, manufacturer instructions, adopted code, and local inspection.
Table of Contents
Quick answer by situation
Choose a full home-run manifold when service control matters most and you have room for dedicated tubing. Choose a compact manifold or combination layout when fixtures sit close together and storage is tight. Keep a simple trunk-and-branch layout when short shared runs already provide acceptable pressure, wait time, and repair access.
- New foundation-built tiny house: A central hot and cold manifold is easy to plan before walls close, especially when the kitchen and bath share a utility zone.
- Tiny house on wheels: Use a small, firmly mounted manifold with supported tubing, accessible shutoffs, freeze protection, and enough flexibility for vibration.
- Existing house with short piping: Do not replace a sound trunk system only to add a manifold. A few well-placed fixture stops may solve the real problem.
- Frequent winterizing: Favor visible, drainable runs and a cabinet that stays inside the heated envelope. Plan low-point drains only where the approved design calls for them.
- Limited cabinet space: A mini-manifold serving the bath or kitchen can provide local control without sending every line back to one large panel.
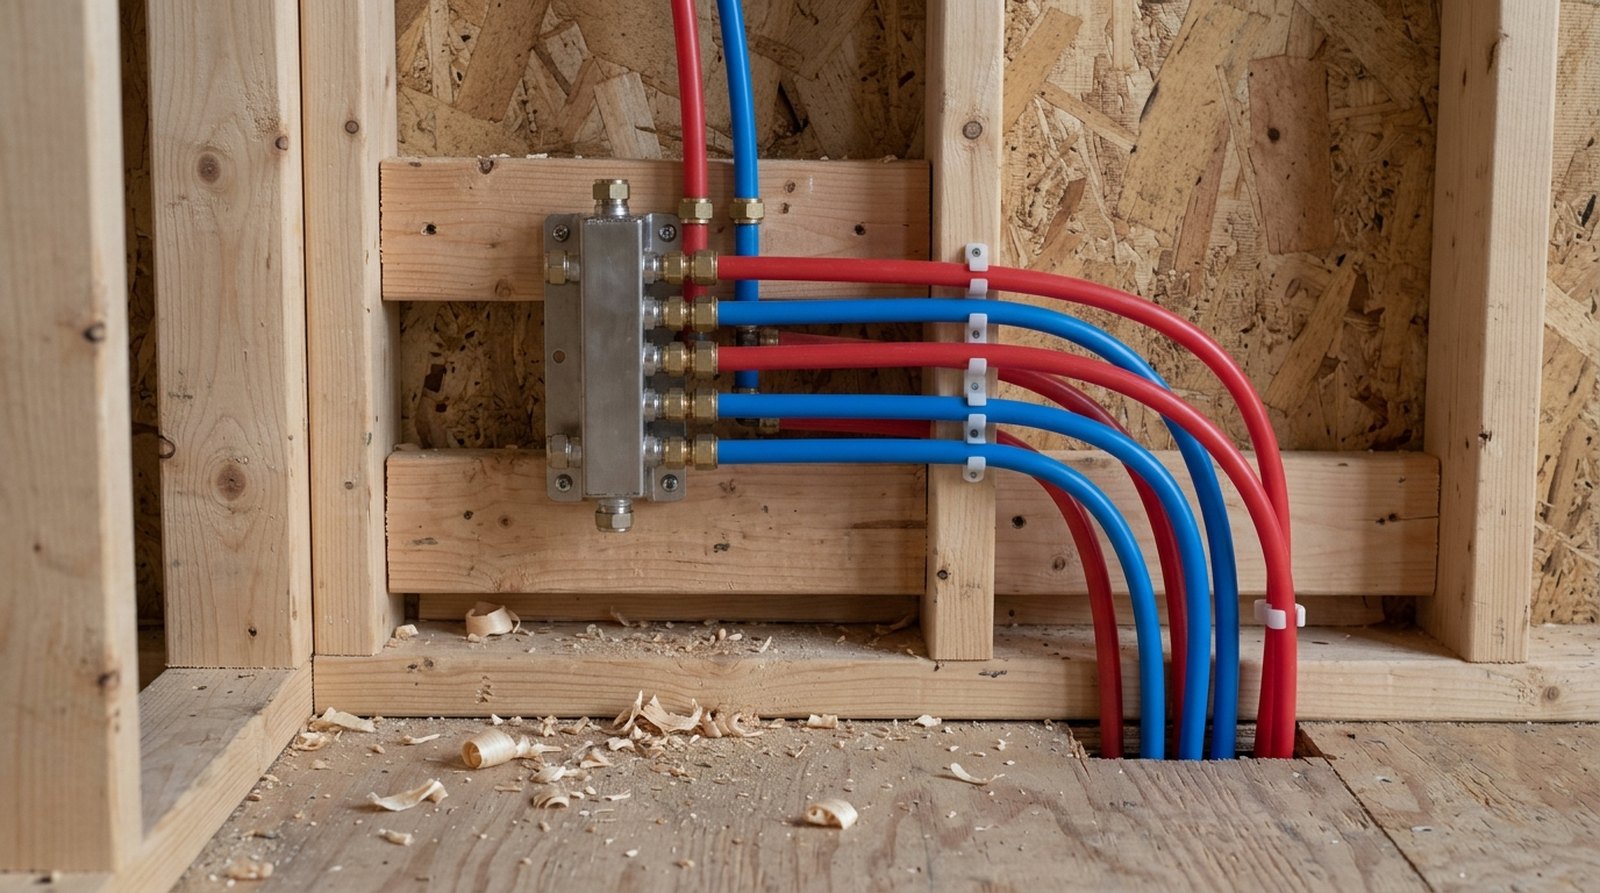
Home-run vs. trunk-and-branch layouts
A home-run system sends a dedicated hot or cold line from the manifold to each fixture, while trunk-and-branch piping shares larger mains before splitting near fixtures. Home-run plumbing uses more tubing but fewer hidden fittings. Trunk systems can use less tubing, and combination systems often suit tiny houses best.
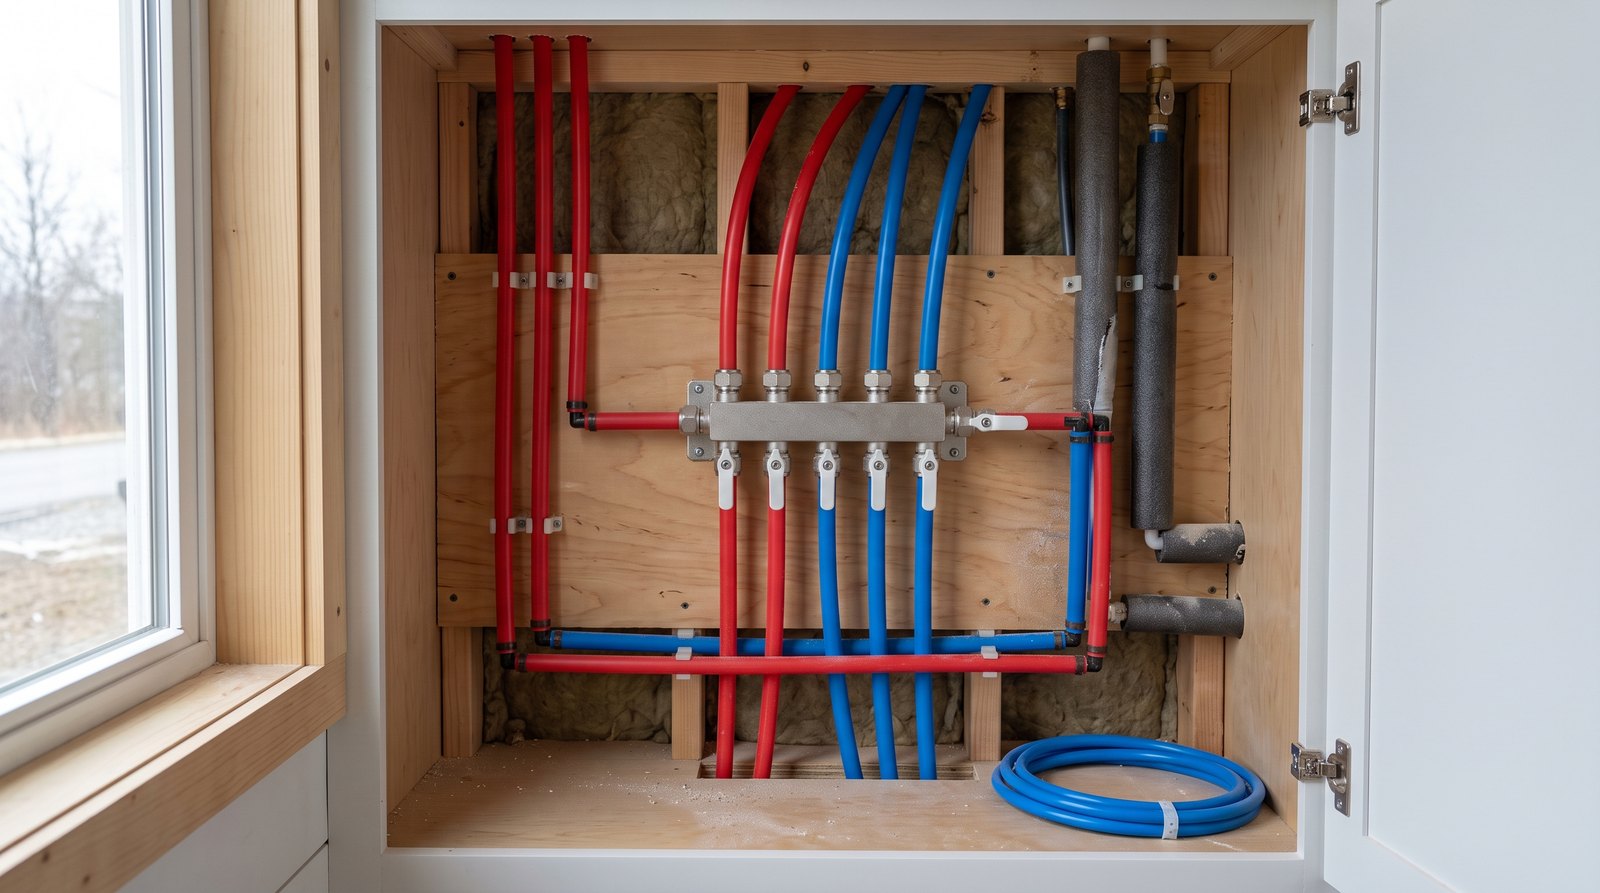
In a true home-run layout, the manifold acts much like an electrical panel. Each labeled valve controls one sink, toilet, shower, washer, or exterior connection. That makes troubleshooting straightforward. You can shut off the kitchen faucet without taking the whole house out of service, and most branch connections remain visible at the manifold and fixture.
The tradeoff is tubing. Manufacturer guidance describes manifold systems as having dedicated fixture runs, few fittings, and more linear feet of pipe than trunk-and-branch systems. In a tiny house, that extra footage may still be modest because the floor plan is small. The difficulty is routing several tubes through narrow framing without crowding, sharp bends, abrasion, or excessive drilling.
A combination layout uses a larger trunk to reach a fixture group, then a small manifold or multiport fitting supplies short dedicated branches. This can be a sensible middle ground for a bathroom at one end and a kitchen at the other. It reduces long parallel runs while keeping important connections accessible.
How to size the manifold and branch lines
Size the manifold from connected fixture demand, available pressure, developed pipe length, allowable pressure loss, and the exact tubing system, not from port count alone. A manifold with enough outlets can still be undersized at its inlet. The adopted plumbing code, approved sizing method, product listing, and manufacturer tables control the final answer.
Start with a fixture schedule. List every cold outlet and every hot outlet separately. A bathroom lavatory normally needs one of each, while a toilet needs cold only. Add the kitchen sink, shower, washer, water heater connections, hose bibb, refrigerator, and any future fixture you genuinely expect to install. Spare ports are useful, but unused ports must be capped exactly as the manifold manufacturer specifies.
Next, separate port count from flow capacity. A 12-port assembly may provide six hot and six cold outlets, but that does not automatically make it right for every 12-line plan. The body size, inlet size, branch size, fittings, regulator setting, pump curve, and simultaneous demand all matter. Long runs and restrictive fittings consume available pressure.
Many residential home-run systems use small dedicated PEX branches, but there is no universal branch size for every fixture. A low-flow lavatory on a short run presents a different demand than a shower, tub filler, or washing machine. Use the sizing tables for the listed system and the rules adopted where the house will be installed.
Compatibility also matters. PEX-A, PEX-B, crimp, clamp, cold-expansion, and push-to-connect products are not interchangeable merely because the nominal tube size matches. Use a manifold, tube, fittings, rings, tools, and joining method that are approved to work together. Mixing systems can jeopardize the listing, warranty, and inspection.
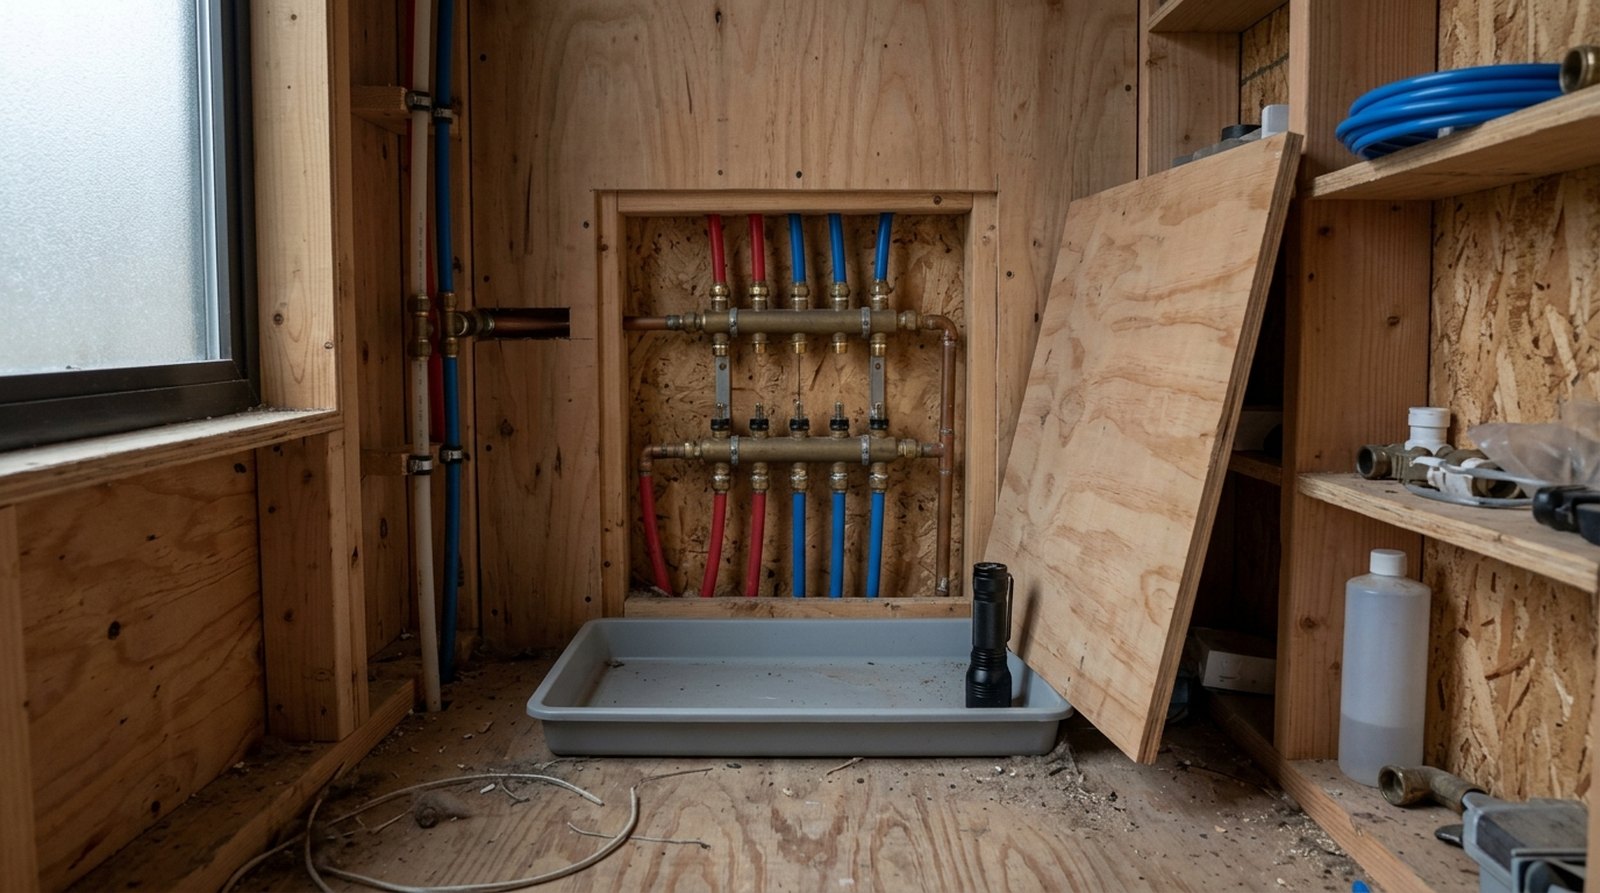
Where to mount a tiny house plumbing manifold
Mount the manifold upright and square on solid blocking in a dry, protected service area that remains accessible after finishes and furniture are installed. Leave room to operate every valve, inspect every joint, support each tube, and replace the assembly. Keep it away from electrical equipment and uncontrolled freezing conditions.
Manifolds with integral or field-installed valves need access under the model plumbing code, and remote valves should be identified by the fixture or appliance served. Use durable labels on the cabinet or a nearby schedule, not marker directly on tubing where it may fade. Label hot and cold lines consistently, and include any exterior or seasonal outlet.
Support the manifold on plywood or framing designed for the load. Do not let tubing weight hang from the ports. Maintain the tube manufacturer’s minimum bend radius, use approved supports and sleeves, and protect PEX from screws, sharp edges, heat, chemicals, and ultraviolet exposure. Nail plates may be necessary where tubes pass close to framing faces.
A shallow leak tray can make a slow drip easier to spot, but it is not a substitute for sound joints or a planned drain path. Never route a pan where water can damage wiring or create a hidden mold problem. If the cabinet shares a mechanical space, preserve required clearances and combustion or service access. Good serviceability also supports the longer lifespan discussed in how long tiny houses last.
Pressure, flow, and hot-water wait time
A manifold does not create pressure. It organizes distribution and can reduce fitting losses, but performance still depends on supply pressure, regulator settings, pump output, pipe diameter, run length, and simultaneous use. Dedicated branches may make flow more predictable, while an oversized or unnecessarily long hot line can increase waste and waiting.
Pressure loss rises with flow and length, so do not assume every fixture can use the same branch simply because the house is small. Check the manufacturer’s friction-loss tables and the adopted code’s demand method. For tank-and-pump systems, confirm the pump can supply the planned peak demand at the needed pressure. For a city hookup, verify the regulator and static pressure before blaming the manifold.
Hot-water wait time depends heavily on the volume between the heater and fixture. One current PEX installation guide lists about 0.009 gallon per foot for nominal 1/2-inch tubing. A 20-foot run therefore holds roughly 0.18 gallon. At 1.5 gallons per minute, moving that volume takes about seven seconds, before accounting for startup behavior and mixing.
That example is not a sizing rule. Actual inside diameter, flow, pipe temperature, heater type, and route change the result. Keep hot runs direct, avoid unused loops, and place the heater and manifold close to the main hot-water fixtures when practical. Insulate hot piping where required or beneficial, while following the pipe and water-heater instructions.
Foundation homes vs. tiny houses on wheels
Foundation tiny houses mainly need ordinary residential access, support, and freeze planning. A tiny house on wheels adds road vibration, flex, seasonal hookups, and more frequent draining. The plumbing should be designed for the house’s actual classification and use, because a THOW may be regulated or serviced differently from a permanent dwelling.
In a mobile build, mount the manifold to structural blocking and support tubing near the cabinet without making connections rigidly carry movement. Avoid loose coils that can rub against sharp edges. Follow the tubing manufacturer’s support spacing and fastening instructions, and inspect joints after transport. The distinctions in tiny house vs. RV living can also affect hookup expectations and service options.
Freeze protection starts with location. Keep the manifold and vulnerable branches inside the conditioned envelope when possible. Seal air leaks around penetrations, insulate without separating pipes from indoor heat, and protect exterior connections. A cabinet against an exterior wall can freeze even when the living area feels comfortable.
For seasonal shutdown, use the winterizing procedure approved for the installed equipment. Shut off the source, disconnect hoses, drain tanks and heaters as directed, and address low spots that can trap water. Compressed air can damage components when pressure is not properly controlled, so follow product instructions rather than improvising.
Installation sequence and service details
Plan and label the system before cutting tube, then mount the manifold, route supported branches, make listed connections, pressure-test, inspect, and document everything before closing walls. A neat-looking panel is not proof of compliance. The installed system must match the manufacturer’s instructions, adopted code, approved plans, and inspector requirements.
Use this practical sequence:
- Map fixtures: Mark every hot and cold outlet, anticipated flow, pipe length, and shutoff location.
- Confirm the system: Verify manifold material, fitting standard, tubing type, tool, and connection method are mutually approved.
- Build the backing: Install solid blocking and any service cabinet before the manifold goes in.
- Dry-fit routes: Check bends, framing holes, support points, insulation, and protection plates without stressing the ports.
- Make connections: Cut square, prepare the tube, and complete each joint with the listed tool and procedure.
- Label valves: Identify the exact fixture served, including exterior taps and appliances.
- Test and inspect: Use the required test method and pressure, check every accessible joint, and obtain inspection before concealment where required.
Do not bury a repair coupling simply to correct a poor route. Rerun the branch when practical. Keep a record of product names, sizes, test results, photos, and spare parts. Exercise shutoff valves periodically if the manufacturer permits it, and investigate staining, mineral deposits, corrosion, damp wood, or pressure changes promptly.
What a manifold system costs in 2026
For a small tiny house, expect roughly $250 to $800 for a do-it-yourself manifold, potable-water PEX, fittings, supports, valves, and protection hardware, excluding tools and permits. Professional installation or a difficult retrofit can reach about $1,000 to $3,000 or more, depending on access, fixture count, region, and inspection requirements.
The manifold itself varies widely. Current retail examples put a basic valveless 12-outlet copper manifold near $60 to $70, while a 12-port PEX-A manifold with individual brass valves is about $189. A 500-foot coil of 1/2-inch PEX currently runs roughly $120 to $175 depending on color and seller. Smaller projects may need far less tubing.
Retrofits cost more when finishes must be opened, old lines removed, structural holes corrected, or fixtures kept operational during the work. Ask each contractor to state the manifold brand, tubing system, port and inlet sizes, valve count, testing, permits, wall repair, and warranty. The cheapest quote is not comparable if it omits access or inspection.
Frequently asked questions
A plumbing manifold can be a strong fit for a tiny house, but it is a layout choice rather than an automatic upgrade. These short answers cover the questions owners ask most often about shutoffs, sizing, access, winter use, and retrofits. Confirm the final design with the product instructions and local authority.
Does every tiny house need a plumbing manifold?
No. A short, well-designed trunk-and-branch system can perform perfectly well in a compact floor plan. A manifold becomes attractive when you value individual shutoffs, visible central connections, and easy isolation. Compare pipe length, fitting count, cabinet space, hot-water delay, and service access before deciding.
Can one manifold serve both hot and cold water?
A combined assembly may contain separate hot and cold sections, but the two water paths remain separate. Other systems use two independent manifolds. Follow the product’s listing and installation instructions, provide the correct inlet and branch sizes, and label every valve so users cannot confuse the supplies.
Where should the manifold go in a tiny house?
Place it in a dry, accessible service cabinet near the fixture cluster and water heater, preferably inside the conditioned envelope. Mount it on solid blocking with room for valves, supports, inspection, and replacement. Avoid exterior cavities, inaccessible furniture, electrical panels, heat sources, and places where a leak would stay hidden.
Is 1/2-inch PEX right for every fixture run?
No. Nominal 1/2-inch PEX is common, but fixture demand, run length, available pressure, fitting method, and manufacturer limits determine branch size. Some listed systems use smaller dedicated branches for certain fixtures. Use approved sizing tables and local code rather than copying a layout from another tiny house.
Can I add a manifold to existing tiny house plumbing?
Yes, but a retrofit is worthwhile only when the improved shutoff control or routing justifies opening finishes and replacing sound pipe. First map the existing system, check access, confirm material compatibility, and price wall repair. A mini-manifold for one fixture group may be less disruptive than a complete home-run conversion.