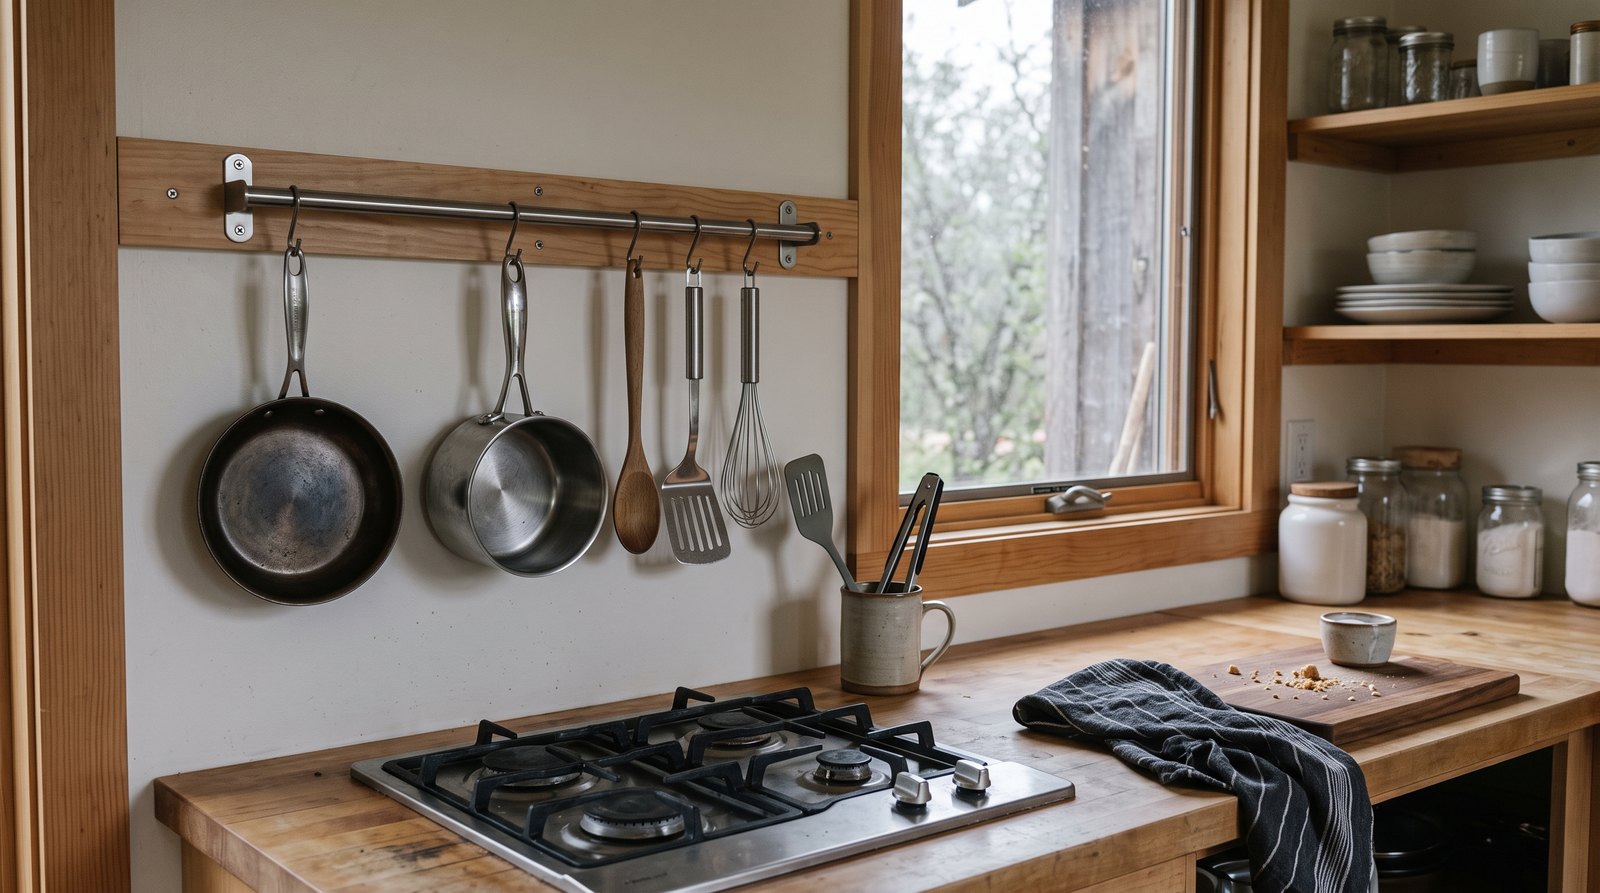
Tiny house pot racks work best when they are anchored to studs or purpose-built blocking, kept outside the cooktop heat zone and normal head path, and limited to a verified working load. In a tiny house on wheels, every hanging item also needs a safe travel position. A simple wall rail is usually the most practical choice.
Table of Contents
Which wall-storage system works best in a tiny kitchen?
For most tiny kitchens, a short wall rail with fixed brackets and removable hooks offers the best balance of capacity, shallow depth, cleaning access, and cost. Pegboard is better for frequent rearranging, while shelves and baskets suit lighter items. Ceiling racks only make sense where framing, reach, and head clearance all work.
Start with the items that are difficult to store, not with an empty wall and a catalog. Lay out the pans, lids, strainers, utensils, towels, and baskets you actually use. Weigh the heavier pieces. Then choose one compact system that keeps the most-used items reachable without crowding the sink, cooktop, window, or entry.
Quick answer by situation
- One or two daily pans: Use a 18 to 30 inch rail fastened into studs or solid blocking.
- Changing collection of tools: Use framed pegboard with spacers and locking or closed hooks.
- Light produce, towels, or cleaning cloths: Use shallow baskets on a rated rail, away from heat.
- Heavy cookware: Use a rated wall rack or shelf bracket system attached directly to framing.
- Very small THOW kitchen: Store heavy pans low while moving, even if they hang when parked.
- Open area above an island: Consider a ceiling rack only after confirming framing and head clearance.
How should a pot rack attach to the wall?
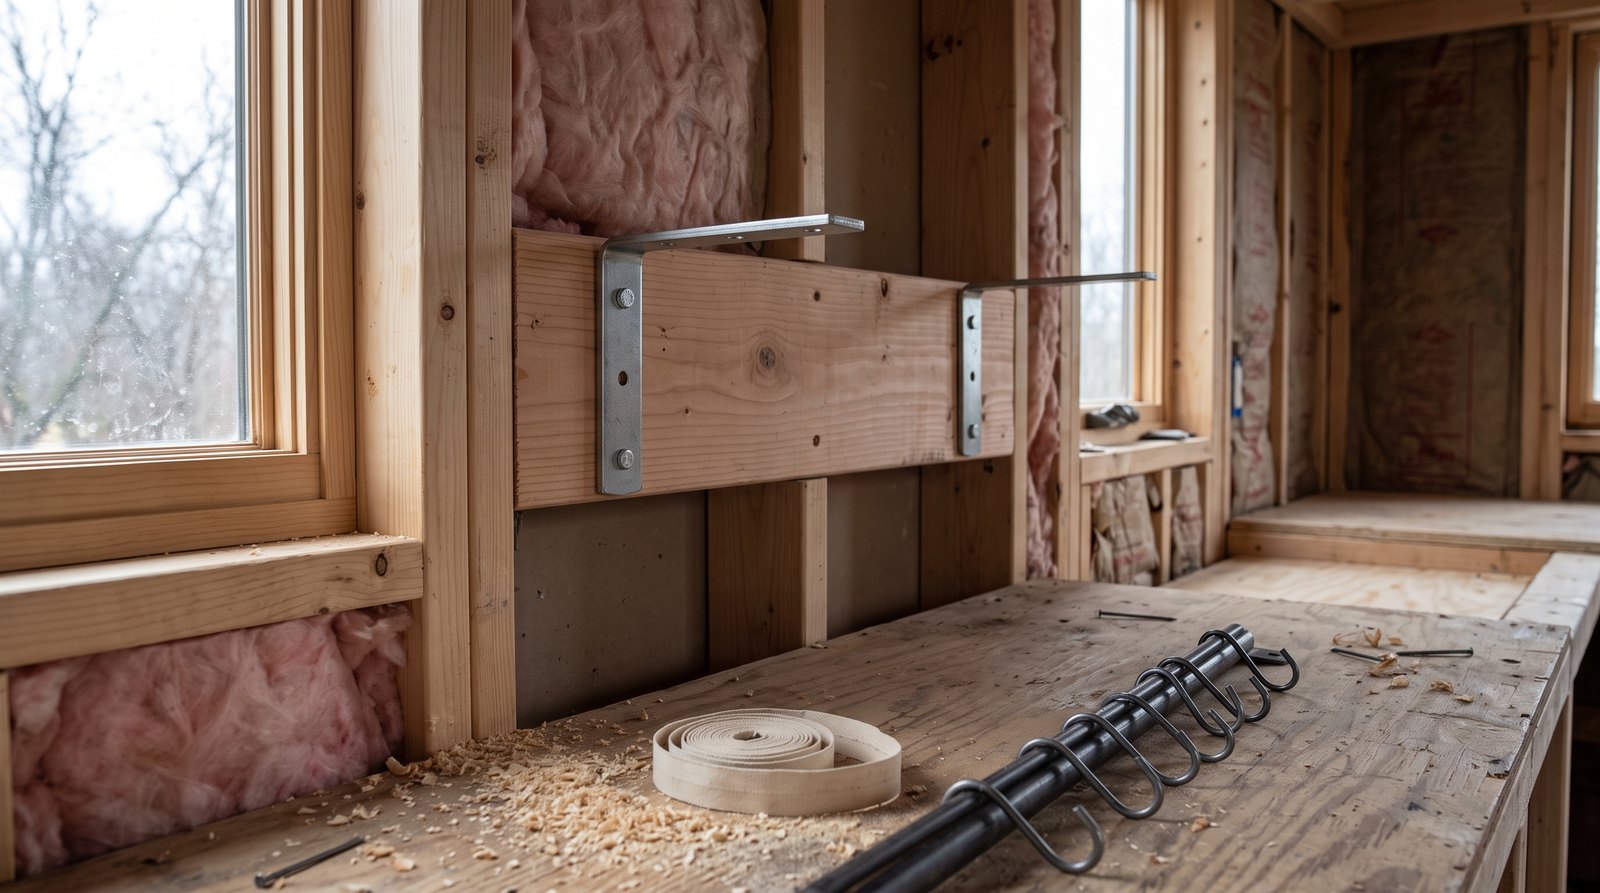
A loaded pot rack should attach to wall studs, solid wood blocking, or another connection specifically designed for the wall assembly and verified load. Drywall, thin paneling, and finish boards are not structure by themselves. Use the rack maker’s fastener pattern and treat the lowest-rated component as the system limit.
The system load includes the rack, every hook, every pan, and anything placed on a shelf. It also includes the extra force created when someone pulls a pan sideways or drops it onto a hook. A hook rated for nine pounds does not make an entire rail safe for any number of nine-pound loads. Rail brackets, screws, blocking, and framing must carry the combined load.
During construction, install blocking before the wall finish goes up. A continuous board between studs gives you flexibility to place brackets where the kitchen layout needs them. In a finished house, use a reliable stud finder, confirm locations from more than one direction, and avoid drilling where wiring, plumbing, or gas lines may run. If the fastener location is uncertain, open a small inspection area or hire a qualified installer.
Are ceiling pot racks a good idea in a tiny house?
A ceiling pot rack can work above a fixed counter or island, but it is rarely the safest default in a narrow tiny house. It must connect to known ceiling framing, remain outside normal walking and door paths, and hang low enough to reach without stretching. Never suspend it from ceiling finish alone.
Before buying, make a full-size cardboard outline and hang lightweight mock pans from string. Live with that mock-up for several days. Open every cabinet and appliance door, carry groceries through the kitchen, and check sight lines. A rack that looks compact on a plan may feel like a low obstacle in a seven-foot-wide room.
Confirm the direction and location of joists or trusses before drilling. Factory-built roof trusses should not be cut, notched, or altered to make a bracket fit. If the desired mounting points miss the framing, a carpenter or the tiny house builder can design proper blocking or a spreader plate. The product’s rated load still applies after the support is solved.
Keep heavy cast iron off a ceiling rack if removing it requires lifting above shoulder height or leaning across a hot surface. A lower drawer often uses space more safely. Ceiling storage is best for a modest number of lighter pans in a stationary home with generous counter coverage below.
What about pegboards, shelves, baskets, and knife strips?
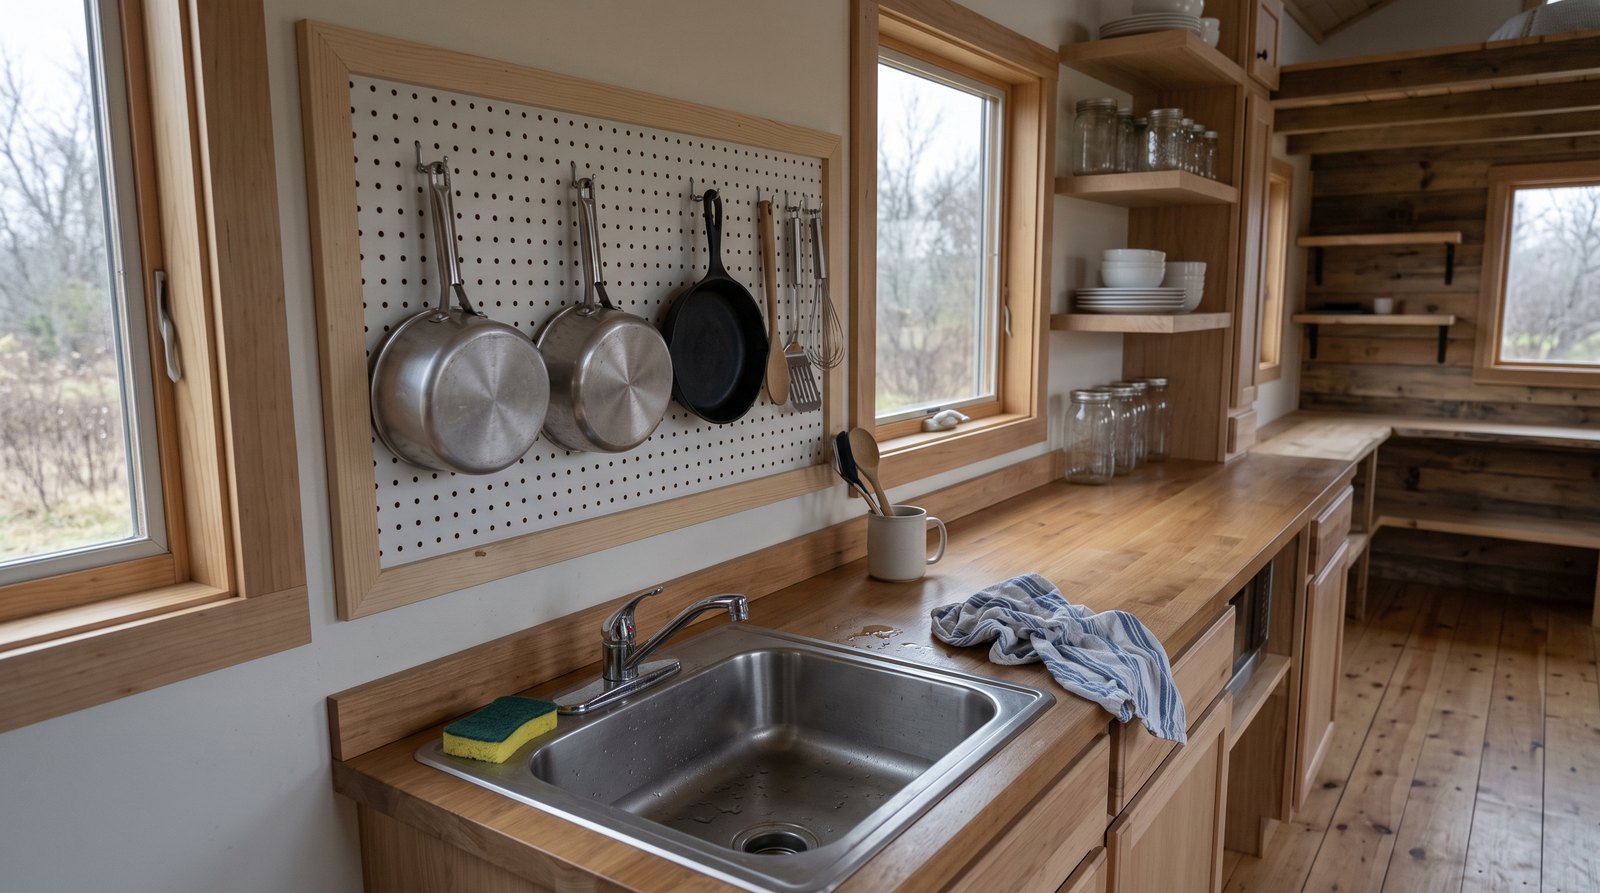
Pegboards and rails are the most flexible choices, shallow shelves suit stable light items, and baskets contain small supplies that would otherwise scatter. Magnetic knife strips can free drawer space, but they need strong anchoring and careful placement. In every case, keep stored objects out of the walkway and away from children.
A framed pegboard needs a gap behind it so hooks can engage. Fasten its frame into studs or blocking, then use hooks sized for the board thickness. In a stationary foundation home, ordinary hooks may be adequate for light utensils. In a THOW, use retainers, closed hooks, or a removable panel cover, and take heavy pans down before towing.
Mount a magnetic knife strip where an adult can reach the handles without crossing a burner or sink. Keep blade tips and handles outside the aisle, and make sure each blade contacts enough of the magnet to hold securely. Homes with young children may be better served by a latched drawer insert. A current IKEA magnetic rack costs about $18, but secure installation matters more than price.
How far should storage stay from the cooktop and sink?
Keep wall storage outside the heat, flame, steam, and grease zones identified by the appliance manufacturer. Do not use a generic internet measurement as permission to crowd a cooktop. The range, cooktop, hood, wall finish, and adopted building and fire rules can each impose different clearances.
Read the installation manual before drilling. As one example of why model-specific instructions matter, a current Whirlpool range manual calls for 30 inches from the cooktop platform to an uncovered wood or metal cabinet, with a smaller dimension allowed only when the cabinet bottom has the specified protection. That figure is not universal and does not replace the instructions for your appliance.
Avoid hanging towels, paper, wood utensils, plastic baskets, or oily cookware where heat can reach them. Keep pot handles from swinging over burners. Near a sink, choose corrosion-resistant hardware and seal any penetrations in a wet backsplash as the wall manufacturer directs. Leave enough room to wipe the wall and the back of the storage system.
What changes for a tiny house on wheels?
For travel, remove heavy cookware from open hooks and store it low in a latched cabinet or secured bin. A wall rack that is safe while parked may still allow pans to swing, strike a window, release from an S-hook, or overload a bracket on rough roads. Positive restraint is the key difference.
Use closed hooks, locking clips, rail end stops, and cabinet latches rated for the intended use. A fitted canvas cover or removable crossbar can retain light tools, but it should not become the only restraint for cast iron. Walk through a departure checklist and verify the rack is empty or locked before towing.
Weight location matters too. Several heavy pans high on one wall raise the center of gravity slightly and concentrate load on the structure. Store the densest items low and near the trailer’s intended balance area. If you are unsure how an addition affects towing weight, review the broader differences in tiny houses versus RVs for full-time living and ask the builder how the wall was framed.
How do you install wall storage safely?
Plan the full load and clearances first, locate framing second, and drill only after the layout passes a real-use test. Use the manufacturer’s template and fasteners that suit the actual wall assembly. Finish by loading the system gradually, checking deflection, and creating a separate travel setup for any mobile tiny house.
- Inventory and weigh: Record the rack, hooks, pans, lids, baskets, and expected shelf contents.
- Map conflicts: Mark the cooktop zone, outlets, switches, plumbing, windows, cabinets, and door swings.
- Test the reach: Tape the outline to the wall and simulate removing each item without leaning over heat.
- Find structure: Confirm studs or blocking and the likely path of utilities before making holes.
- Follow the instructions: Use every required bracket, screw, washer, spacer, and rail stop.
- Load slowly: Add light items first, then heavier pieces while watching for movement or wall damage.
- Make a travel plan: Label a low cabinet or bin for cookware that comes down before towing.
What should you budget in 2026?
A basic rail-and-hook setup can cost about $15 to $50 in materials, while a framed pegboard or wall grid typically lands around $40 to $150. A substantial wall or ceiling pot rack can run roughly $100 to $350 or more. Blocking, wall repair, custom metalwork, and professional labor increase the total.
These are planning ranges, not bids. Current mass-market listings show rails below $20, hooks below $6 per pack, wall racks around $28, and coordinated wall systems from about $128 to more than $250. Add appropriate screws, finish repair, sealant, rail stops, and travel restraints. Premium racks and custom fabrication can cost considerably more.
Do not judge value only by how many pans a rack claims to hold. A smaller installation that stays clean, keeps the aisle open, and survives travel is worth more than maximum capacity. Protecting the building from leaks, loose fasteners, and moisture also supports the service life discussed in how long tiny houses last.
How do you keep the system safe and clean?
Wipe rails, hooks, pegboards, and nearby walls often enough that grease never builds into a sticky film. Monthly, check bracket alignment, loose screws, corrosion, cracked wood, enlarged pegboard holes, and bent hooks. In a THOW, inspect after travel. Remove the load immediately if anything shifts or deforms.
Use mild cleaner compatible with the finish and dry metal parts after cleaning. Do not mix strong cleaners over food-preparation surfaces. Wash pans before hanging them, and avoid storing damp lids flat against a wall where trapped moisture can mark finishes or encourage mold.
Reassess the layout when cookware changes. A heavier pan, extra basket, or new appliance may invalidate the original plan. Keep a note of the rack and hook ratings with the house records, along with photos of concealed blocking taken during construction. Those records help future owners and insurers understand what is behind the wall. For broader coverage questions, see tiny house insurance costs and coverage.
Frequently asked questions
Tiny house wall storage is safe when the attachment, load, clearance, and travel plan are treated as one system. The short answers below cover the most common decisions, but product instructions, known framing, appliance clearances, and locally adopted building and fire rules should control the final installation.
Can drywall anchors hold a tiny house pot rack?
Drywall anchors may be suitable for a very light accessory only when the product and anchor makers allow it, but they are a poor default for cookware. A loaded pot rack should usually connect to studs or solid blocking. THOW vibration makes direct structural attachment and a separate travel restraint even more important.
How high should a pot rack hang?
Hang it where the shortest regular user can remove a pan without stretching, while the tallest person can pass or work without head contact. There is no single correct height. Test a cardboard mock-up, keep it out of walkways, and follow appliance clearances anywhere near a cooktop.
Can I hang pans above a tiny house stove?
Only if the stove or cooktop instructions, hood instructions, stored materials, and local rules permit the arrangement. Hanging combustible or greasy items directly above heat is often a poor choice. A nearby side wall, outside the heat and steam zone, usually provides safer access and easier cleaning.
What is the best pot storage for a THOW?
A stud-mounted wall rail works well while parked, but heavy pans should come down for travel and go into a low latched cabinet or secured bin. Use closed or retained hooks for light tools, add rail end stops, and include the storage check on every pre-tow checklist.
How much does tiny house wall storage cost?
Expect roughly $15 to $50 for a simple rail and hooks, $40 to $150 for a framed pegboard or grid, and $100 to $350 or more for a substantial rack. Labor, blocking, tile drilling, wall repair, custom fabrication, and travel restraints can add significantly to the installed price.