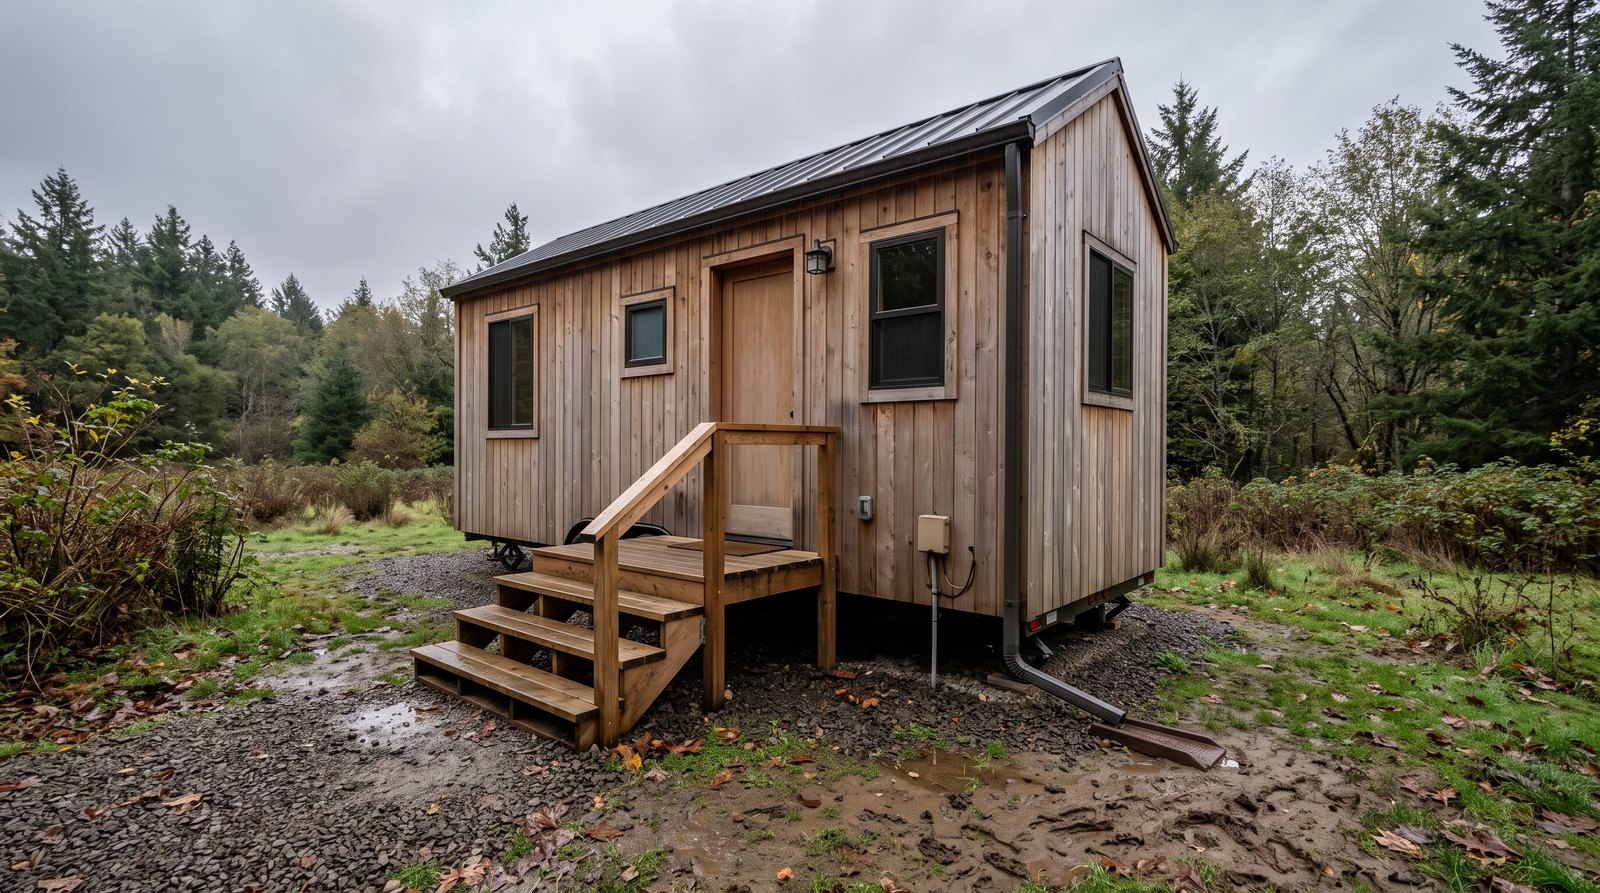
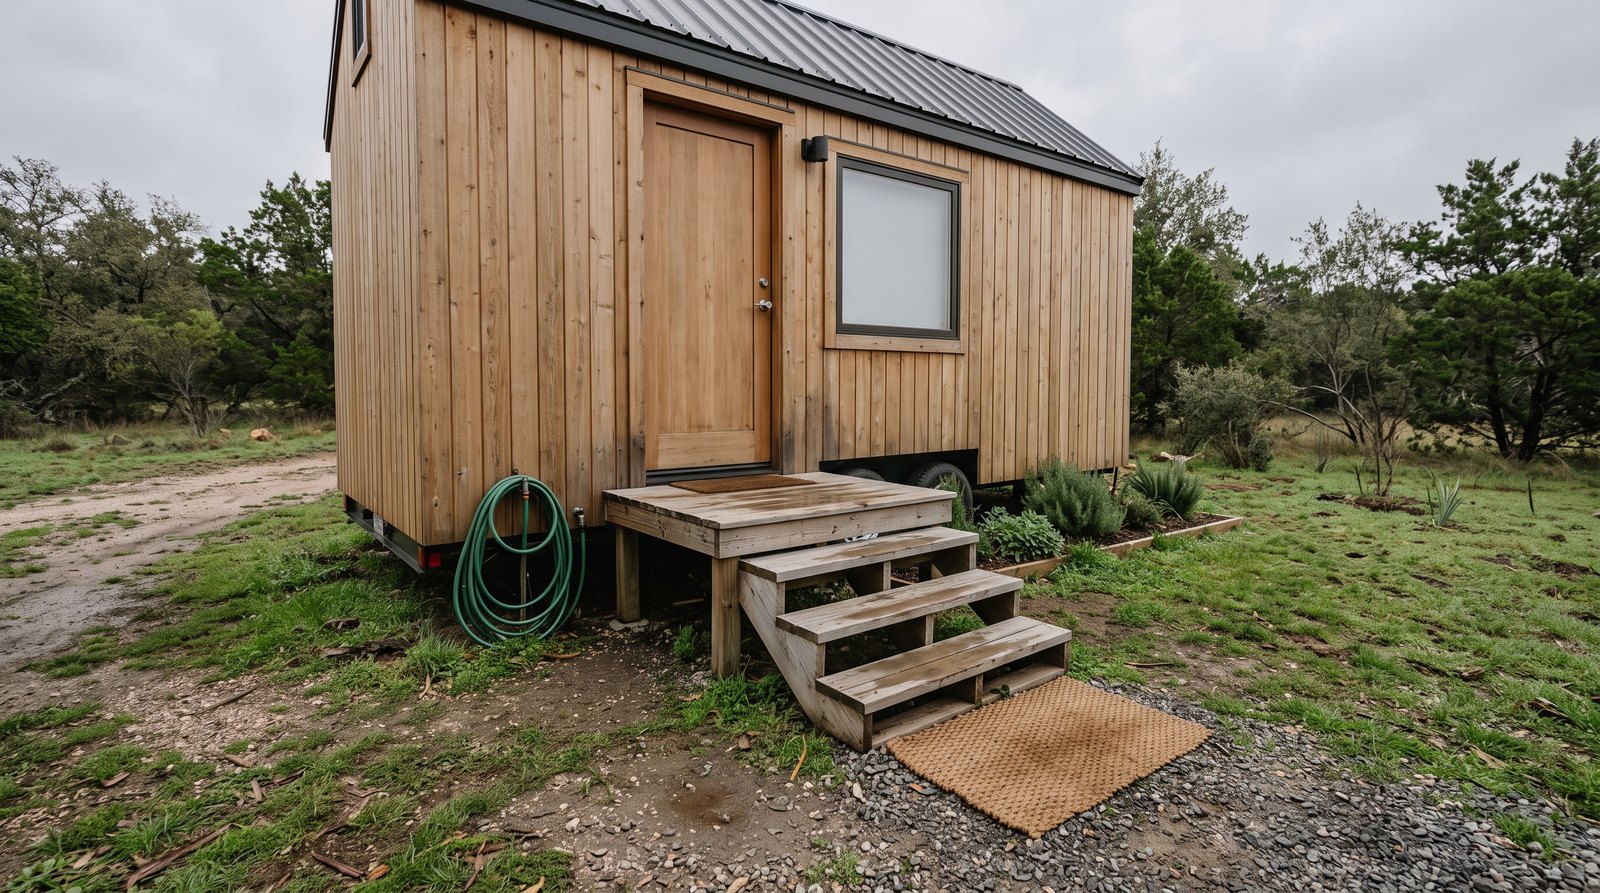
Safe tiny house exterior steps need even risers, deep non-slip treads, a stable landing, firm footings, and a graspable handrail when required. Fixed homes should follow the locally adopted residential code. Tiny houses on wheels also need steps that match the manufacturer’s instructions, campsite rules, and safe travel storage.
Table of Contents
What makes tiny house exterior steps safe?
The safest setup is a short, level, rigid stair run that cannot rock, slide, rack sideways, or pull away from the home. Each tread should feel identical underfoot, the landing should give you room to operate the door, and the route to grade should remain clear in bad weather.
For a code-regulated dwelling, the locally adopted building code is the controlling document. The 2021 International Residential Code is a useful benchmark, but it is a model code, not automatically the law everywhere. States and municipalities adopt different editions and amendments. Ask the city or county building department which rules apply before buying materials.
For a tiny house on wheels, separate three questions. What will the campground or property owner allow? What does the step manufacturer require? Will the assembly remain safe after the trailer is leveled and stabilized? A product sold for an RV is not automatically acceptable as a permanent residential stair.
Should you use portable or fixed steps?
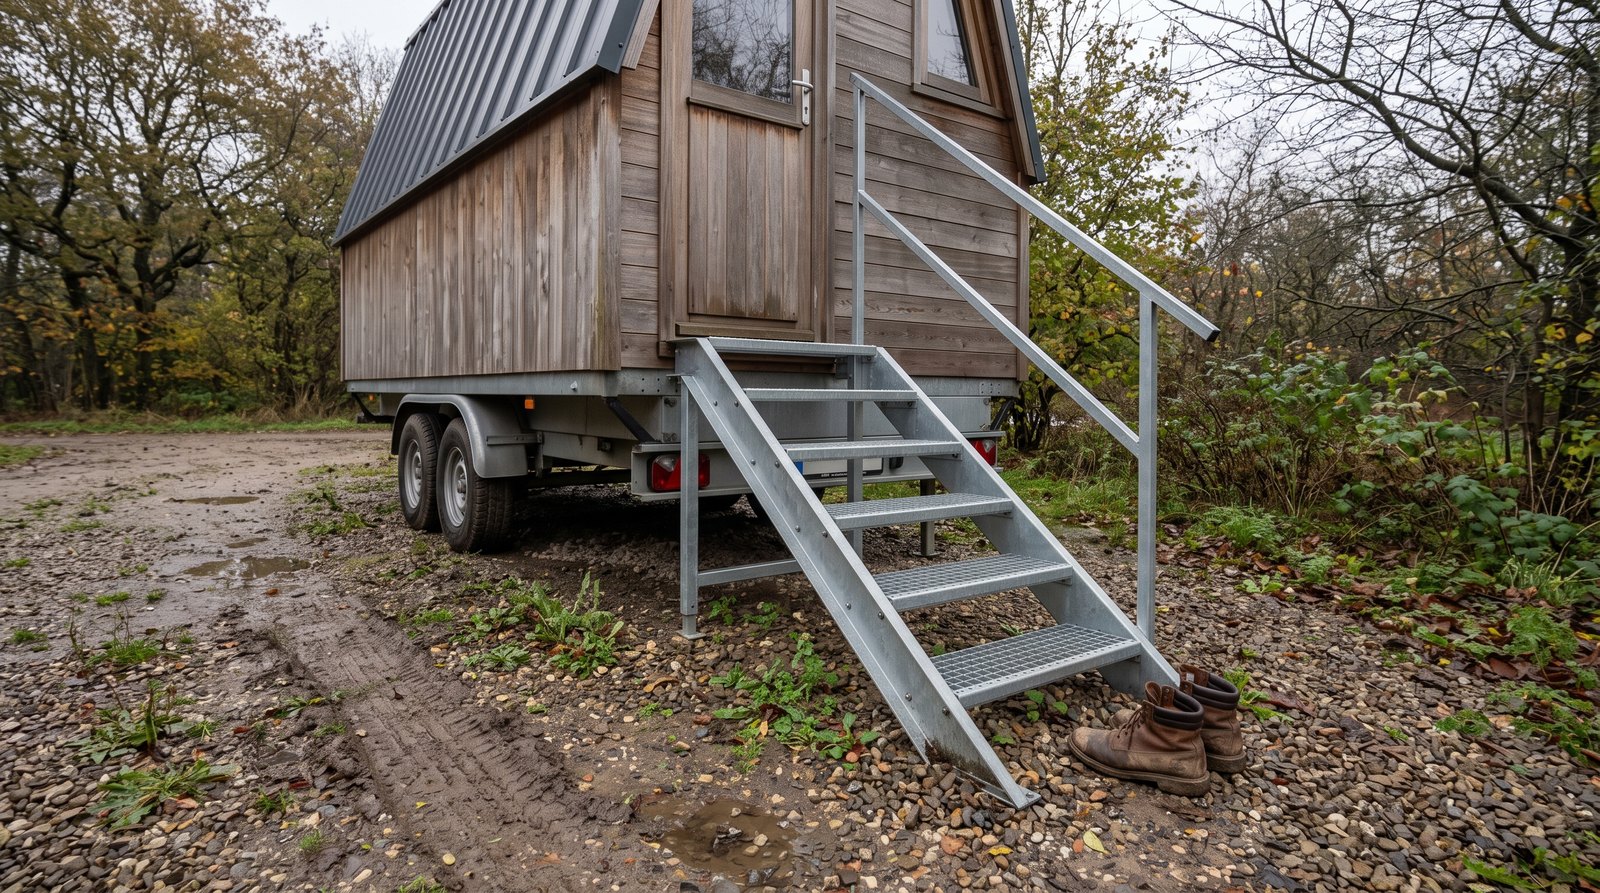
Use portable steps when the house moves regularly, and use fixed stairs when it stays on a permanent foundation or long-term site. Portable systems save travel weight and can adapt to changing ground. Fixed stairs usually offer a better landing, stronger rails, and easier code review, but they require proper footings and attachment.
Adjustable metal RV steps are compact and quick to deploy. Current manufacturer listings put many manual aluminum assemblies around $400 to $900 before installation or accessories. Choose a unit rated for the doorway height and expected load, and extend every adjustable leg onto firm bearing. A dangling or overextended foot is not a harmless inconvenience.
Fixed stairs make more sense for a permitted foundation home. They can be tied to a framed landing, supported on approved footings, and inspected with the rest of the structure. If your THOW will stay parked for years, ask the local authority whether it is being treated as an RV, a dwelling, or another occupancy before building permanent access.
How should you size treads, risers, and landings?
For a conventional residential stair, a practical starting benchmark is a maximum 7 3/4-inch riser, a minimum 10-inch tread, and consistent dimensions throughout the flight. Plan a level landing at both ends, then confirm the exact measurements with the adopted code, permit reviewer, campground, and product instructions.
The 2021 IRC limits conventional stair risers to 7 3/4 inches and requires at least 10 inches of tread depth. Within one flight, the largest and smallest risers, and the largest and smallest treads, generally cannot differ by more than 3/8 inch. That consistency matters because even a small surprise at the top or bottom causes trips.
A straight stair landing is generally at least as wide as the stair and at least 36 inches deep in the direction of travel under the IRC benchmark. Exterior doors also need a landing on each side in most residential situations. Door type and threshold height create exceptions, so do not copy dimensions from a neighboring porch without checking your own door configuration.
When do you need a handrail or guard?
A handrail helps a person grip while using stairs, while a guard prevents a fall from an open edge. Under the common IRC benchmark, a flight with four or more risers needs a handrail on at least one side. Elevated landings and open sides may also need guards, even when the stair already has a handrail.
For conventional stairs, the IRC benchmark places the grasping surface 34 to 38 inches above the line connecting the tread nosings. The rail should be continuous for the flight, easy to grip, and securely anchored. A wide flat board may look like a rail but may not satisfy graspability rules.
Guards are a separate issue. The common IRC trigger is an open-sided walking surface more than 30 inches above the floor or grade below, measured within 36 inches horizontally of the edge. Required residential guards are generally at least 36 inches high at landings, with different stair-side provisions. Local amendments can change these details.
How do you support and anchor the steps?
Support every stringer or adjustable foot on firm, drained, level bearing, then brace the stair against sideways movement. Fixed stairs normally need code-approved footings or a landing pad. Portable systems need pads large enough to prevent sinking and a restraint method that does not damage the trailer frame or siding.
Loose soil, mulch, wet grass, and stacked patio scraps are poor foundations. Use a properly prepared gravel base with pavers, an approved concrete pad, or another solution accepted for the site. In frost country, permanent supports may need to extend below the local frost depth. Ask the building department rather than guessing.
Attach fixed stringers with approved structural connectors and corrosion-resistant fasteners. Do not rely on deck screws driven through end grain. On a THOW, follow the house builder and step manufacturer before drilling the frame. A misplaced hole can weaken steel, expose bare metal to corrosion, or interfere with wiring and plumbing.
How do you handle rain, snow, ice, and mud?
Design the entry so water drains away, tread surfaces stay grippy, and mud is intercepted before it reaches the first step. Add traction that remains effective when wet, provide lighting, and keep a shovel or ice treatment accessible from inside. Weather safety depends more on drainage and maintenance than decorative coatings.
Choose grooved lumber, exterior-rated abrasive strips, expanded metal, or manufacturer-supplied non-slip treads. Apply strips across the walking line without creating curled edges. Smooth paint can become dangerously slick. If you coat wood, use an exterior product intended for horizontal walking surfaces and follow its preparation and recoat schedule.
Slope landings only as much as permitted for drainage, and never create a noticeable pitch toward the stair edge. Extend downspouts away from the entry. A roof drip line that lands on the top tread can produce repeated icing even when the rest of the site is dry.
How should door swing, lighting, and emergency access work?
Keep the landing large enough for the door to operate without forcing someone onto a tread, and maintain a clear path from the interior to safe grade. Add a weather-rated light that illuminates the landing and every step. The entry must remain usable during a power outage, storm, or urgent exit.
Check the actual door swing, screen door, latch side, and handrail location together. A rail that blocks the latch side can make carrying groceries awkward. A screen door may swing differently from the primary door. The landing should also accommodate the person, pets, and any mobility equipment expected to use it.
Do not store a folded stair across a second exit, emergency window, propane shutoff, electrical disconnect, or fire extinguisher. If full-time mobility is your priority, compare the setup burden with the tradeoffs in tiny house versus RV living.
How do you store portable steps for travel?
Portable stairs should travel as secured cargo, not as an improvised attachment hanging from the doorway. Measure the folded unit, weigh it, protect sharp edges, and provide rated tie-down points. Nothing should interfere with lights, brakes, hitch equipment, tire clearance, or the trailer’s legal width and height.
Make a setup checklist: level and stabilize the house, inspect the ground, deploy the stair, lock every hinge or pin, adjust all feet, install the rail, and test for movement. Reverse the order before departure. Photograph the properly stowed arrangement so another driver can repeat it.
Wood stairs are bulky and often heavier than owners expect. Build lifting handles into the side framing or divide the assembly into pinned modules. Never crawl under a trailer to retrieve hardware unless it is safely supported. Include the stairs when estimating payload and planning a move. Our guide to tiny house moving costs explains other transport expenses.
What do tiny house exterior steps cost in 2026?
Budget about $150 to $600 for a simple DIY portable wood stair, $400 to $900 for many adjustable RV-style step assemblies, and roughly $1,400 to $2,600 for professionally installed basic deck stairs. Landings, guards, difficult footings, premium materials, and custom metal fabrication can push the total much higher.
- DIY freestanding wood steps: About $150 to $600 for treated lumber, structural screws or connectors, pads, traction, and basic rail materials. Complex bracing and a landing raise the total.
- Adjustable RV-style steps: About $400 to $900 for many manual assemblies based on current manufacturer pricing, before shipping, rails, brackets, or professional installation.
- Fixed wood stairs: About $1,400 to $2,600 installed for a basic new run is a reasonable national planning range. Site preparation, permits, landing work, and local labor can change it substantially.
- Handrail work: A small outdoor rail installation can add several hundred dollars, while custom metal or long guarded landings can cost far more.
Get an itemized quote that identifies footings, landing framing, connectors, handrails, guards, finish, permits, and removal of old work. The cheapest quote may omit the pieces that make the entry safe. Also tell your insurer about permanent stairs or a deck when required. Changes around the home can affect the coverage discussed in our tiny house insurance cost guide.
Quick answer by situation
Match the stair type to how the tiny house is used, then verify the governing rules before construction. A movable THOW needs compact equipment and repeatable setup. A long-term site needs better drainage and durability. A permitted dwelling needs a code-reviewed stair, landing, rail, and foundation solution.
- You move several times a year: Choose an adjustable, manufacturer-rated metal system with removable rails and a documented storage position.
- Your THOW stays seasonally: Use a braced freestanding stair on prepared pads, with positive locking hardware and a stable handrail.
- Your home is on a permanent foundation: Build inspected fixed stairs and landings on approved footings under the locally adopted code.
- Your site gets snow or freezing rain: Prioritize drainage, tread traction, lighting, and enough landing space for safe shoveling.
- Someone has limited mobility: Ask about a code-compliant ramp, lift, wider landing, two-sided rails, and professional accessibility guidance.
Maintenance checklist
Inspect tiny house exterior steps monthly during regular use and every time a portable system is deployed. Tighten loose connections, correct settlement, restore traction, and stop using the stairs if a tread, stringer, weld, landing, rail, or footing shows movement or structural damage.
Probe wood near fasteners and end grain for softness. Look for split stringers, lifted tread boards, protruding screw heads, and peeling coatings. On steel or aluminum systems, inspect hinges, welds, telescoping legs, pins, and dissimilar-metal contact points. Clean dirt from locking parts before lubricating them as directed.
Finally, test the handrail and stair under controlled load before guests use them. Any rocking, clicking, or visible deflection deserves attention. Good steps should feel boringly solid every day.
Frequently asked questions
Most questions about tiny house exterior steps come down to width, rails, foundations, attachment, and materials. The correct answer depends on whether the unit is a permitted dwelling or a vehicle, plus the code, site rules, and manufacturer instructions that apply. Use these answers as planning guidance, then verify locally.
How wide should tiny house exterior steps be?
For a code-regulated home, conventional residential stairs commonly need at least 36 inches of clear width, subject to permitted handrail projections and local amendments. Portable RV steps may be narrower under product or campground rules. Use the requirement that applies to the home’s legal classification and site.
Do three tiny house steps need a handrail?
Under the common IRC benchmark, a stair flight needs a handrail when it has four or more risers, not merely four treads. A local code, campground, insurer, or accessibility need may require one sooner. Installing a secure graspable rail on a shorter flight is often a sensible safety upgrade.
Can portable steps sit directly on gravel?
They can sit on a properly compacted, level, well-drained gravel base if the manufacturer and site rules allow it. Small feet can sink into loose gravel, so use approved pads or adjustable landing feet. Test for rocking and settlement after rain, trailer leveling, and the first several days of use.
Should steps attach to a tiny house on wheels?
Only attach steps when the tiny house builder, trailer manufacturer, and step instructions allow the connection. Drilling a trailer frame or siding can weaken components, invite corrosion, or hit utilities. A well-braced freestanding system is often safer than an improvised attachment and is easier to remove for travel.
What is the best material for outdoor tiny house steps?
Pressure-treated wood is affordable and easy to customize, while galvanized steel and aluminum offer slimmer, portable assemblies with less routine refinishing. The best choice depends on movement, climate, weight, and maintenance. Whatever the material, prioritize rigid construction, corrosion-resistant hardware, drainage, traction, and replaceable wear parts.